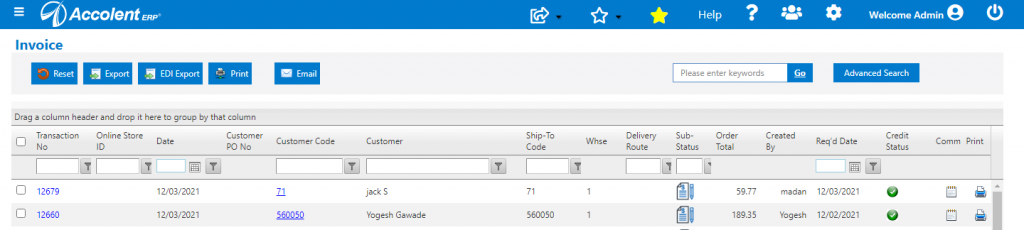
Accolent ERP provides functionality to manage fulfillments and invoices in batches. Populations of orders may be selected by Customer, by Delivery Route by Req’d date and a batch can be created for this population. Then by filtering on the batch, the orders may be selected to be processed through warehouse operations of picking, packing, and shipping. Invoicing can be done by either warehouse personnel or AR personnel. Orders may be added to batches or removed from batches at every stage, and batches may be deleted and new batches created. At every stage in fulfillment and invoicing, orders’ sub-statuses are visually distinguished by icons.
Fulfillment Sub-statuses
- Orders are moved individually to Fulfillment (i.e., no batch process available).
- When orders move to fulfillment, they automatically have the sub-status: Ready to Pick.
- When orders are printed either by auto print or manually, they have the sub-status: Pick Printed.
- Other sub-statuses in fulfillment are: In Picking, Picked, Packed, and Shipped.
- These are the icons displayed in shipping for each sub-status:

Invoicing Sub-Statuses
- The sub-statuses in Invoice are: Invoiced, Sent to Customer, and Paid.
- When orders are moved to invoice, they will automatically be given the sub-status of Invoiced.
- When an invoice is printed with the Print icon on the RHS of the List Invoice screen or multiple invoices are selected and the multiple Print or multiple Email button clicked, the invoice has the sub-status Sent to Customer.
- When any payment is made on the invoice it has the sub-status Paid.
- These are the icons displayed for each invoice sub-status:

Create Batches in Fulfillment
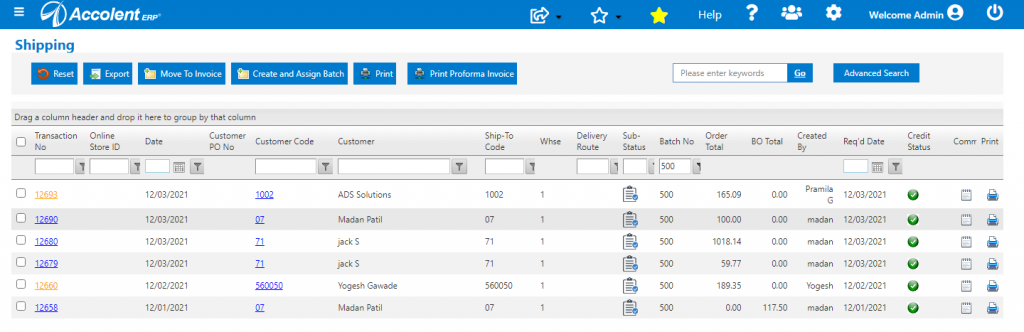
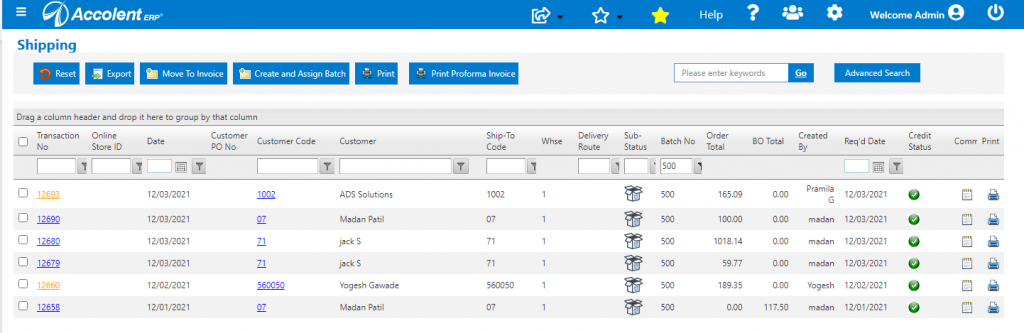
- From the List Fulfillments screen a user can select multiple orders (e.g., 12693, 12690, 12680, 12679, 12660, and 12658) and click Create and Assign Batch to create a batch.
- Within a batch:
- All orders must be in the same status (e.g., Fulfillment).
- All orders must be in the same sub-status (e.g., Ready to Pick).
- All orders must be in the same warehouse.
- Select an assignee, select a Batch Sequence (based on location or how the order will be picked), and click Save, to create batch 500.
- The printed pick ticket and WMS will sort the combined orders by the batch sequence.
- Once the batch is created, the Batch No populates to List Fulfillments screen.
- The List Fulfillments screen can be filtered by Batch 500.
Assign/Update Batch Sub-status
- To assign a new sub-status to a batch, go to Fulfillment > Batch Fulfillment which brings up the Manage Batches screen.
- Select the Batch No from the dropdown then click Go to list all orders in the batch.
- Then select all orders and click on an icon to assign that Sub-status (Pick Printed, In Picking, Picked, Packed, Shipped) to these orders.
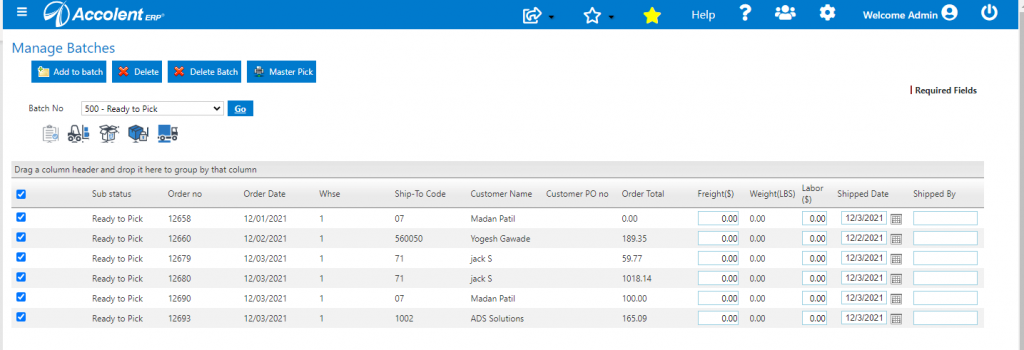
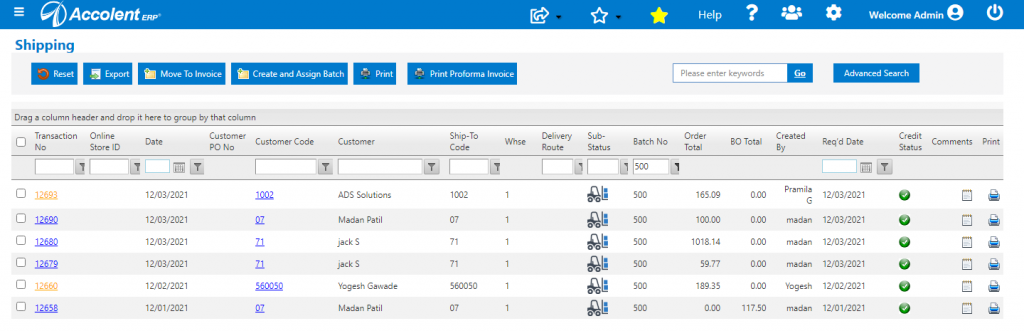
- Click on the Forklift icon to update the sub-status of batch 500 to In Picking.
- The new sub-status is assigned to batch and displays on the List Fulfillments screen.
Picking By Batch
- Picking will usually be done by batch.
- Go to Sales > Fulfillment > Batch Fulfillment to print the Master Pick Ticket to pick all orders in a batch.
- Note that similar products on different orders are grouped but not typically consolidated. If 3 orders are being picked, set up 3 boxes then pick the items directly into the boxes corresponding to their order. This avoids the need to de-consolidate at the end.
- To update batch sub-status, go to the Manage Batches screen, select the Batch No, and assign a new sub-status to Batch 500 of Picked.
- To delete a batch, go to Manage Batches, select the batch select all items, and Delete Batch.
- This will delete the batch NOT the orders which will just be released and then be available to be put on another batch.
Packing
- Packing can be done by batch or individually.
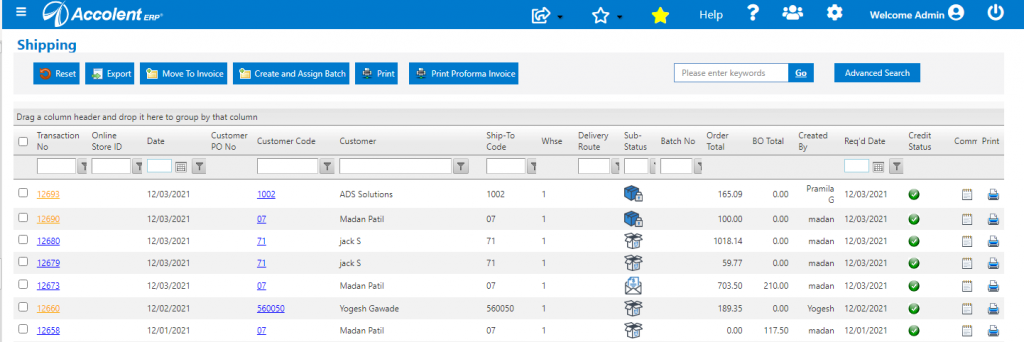
- Delete batch 500 and pack orders 12690 and 12693 individually and update status.
- On the List Shipments screen, 12690 and 12693 are both updated to the sub-status Packed.
Shipping by Batch
- Shipping can be done by batch or individually.
- Create new batch 502 for orders 12690 and 12693.
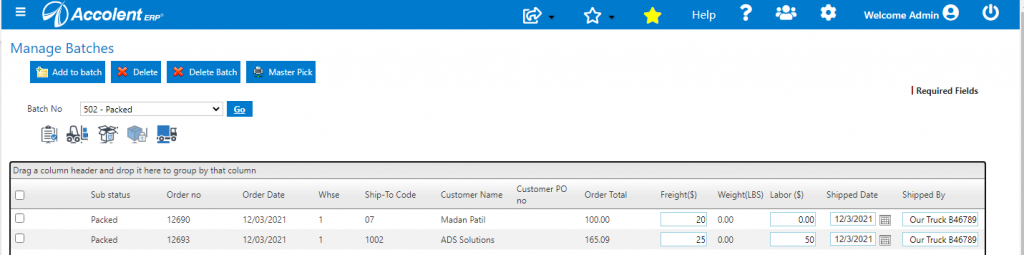
- To batch ship, go to Manage Batches select batch and add Freight and Labor, and update Shipped Date and Shipped By for each order in the batch.
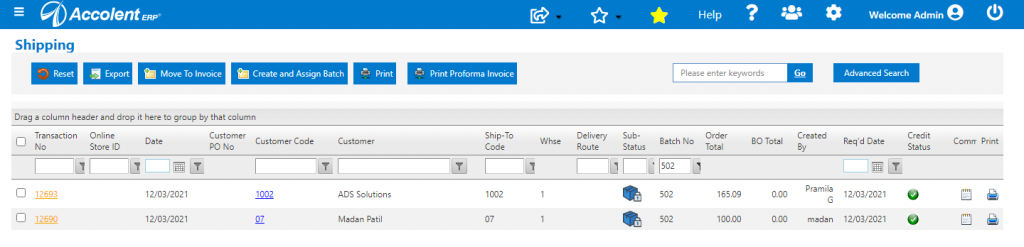
- Go to List Fulfillments and filter by batch 502 to see that the orders were updated.
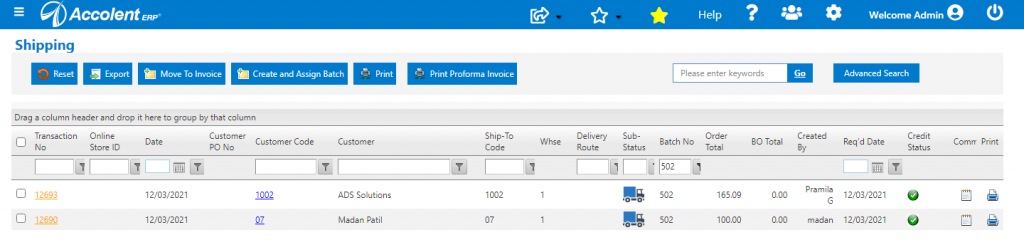
- Here, the Shipped sub-status means that the goods were phyically released from the warehouse but haven’t yet been Invoiced.
- If the business process is to have the Accounting/AR department create invoices, the List Fulfillments screen can be filtered to display all shipments with Shipped sub-status – these may be selected and then moved to invoice.
Invoicing by Batch
- Multiple orders can be moved to invoice as a batch.
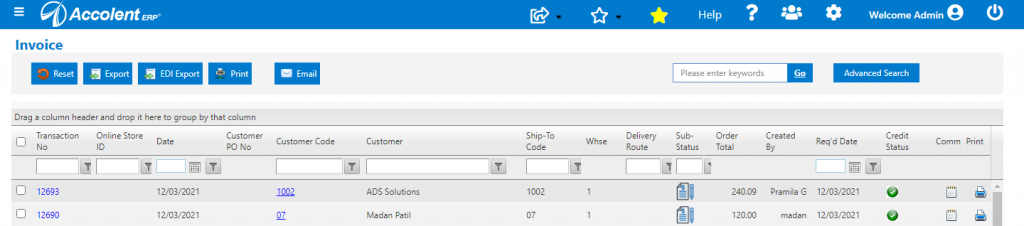
- From the List Shipments screen, filter by batch 502, select orders, and then click Move to Invoice.
- If the selected orders have all required information, they will be moved to invoice; orders missing any information will be skipped and a message to that effect will appear.
Batch Invoicing from Receivables
- Go to Receivables > Batch Invoice.
- Search using dates and warehouse for a population of shipments then select those to move.
- If desired, from this screen, freight labor, shipped date, and shipped by can also be added.
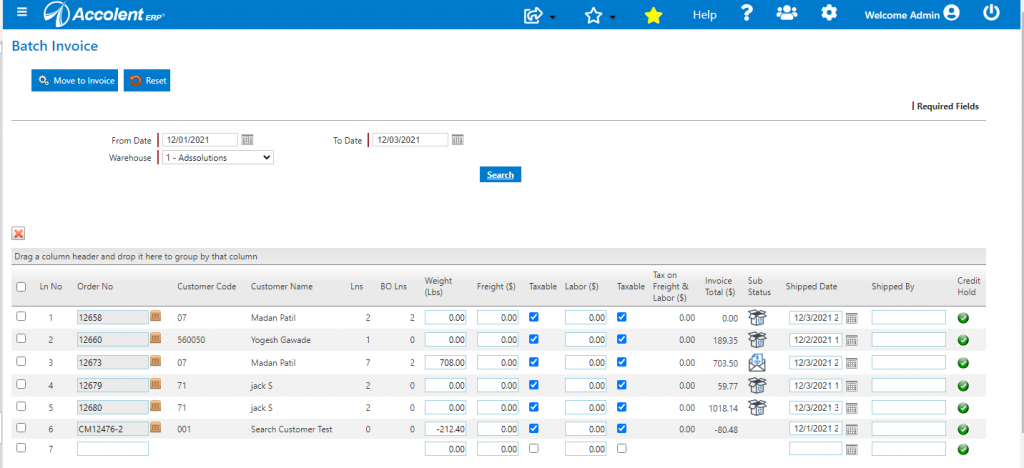
- Select 12660 and 12679 and Move to Invoice.
- Both 12660 and 12679 successfully moved to Invoice.