
An Accolent ERP repair order differs from a regular order only in that it is related to a serialized product (usually but not necessarily that was previously sold to the customer). The repair transaction is recorded on the serial record of the product being repaired. In this way all repairs under warranty or otherwise together with all details of the repair (e.g., when the repair was done, what parts were replaced, what was checked, how much labor) will be recorded on the product’s serial record. If the product being repaired does not require the maintenance of a serial record, then a regular order rather than a repair may be used to charge for the repair components and labor.
Overview of Repairs
- To enter a Repair, go to Sales > Orders > Create Repair.
- There will be one repair order for each product to be repaired.
- A repair should not be co-mingled with other sales items.
- Enter the Customer on general tab and then fill out products tab just as for any other regular sales order.
- The products entered will be only those needed to complete the repair (i.e., replacement parts, new parts, labor).
- For repairs under warranty, zero out the price, check the Warranty flag and enter comment that repair parts and labor were supplied under warranty.
- The serialized product being repaired will be entered from Actions > Repair Product, which will then update the serial record.
- When a Repair Order is saved it will show in List Orders screen.
- When a Repair Order is moved to Shipping it will show in List Shipments screen.
- When a Repair Order is moved to Invoice it will show show in List Invoices screen.
Repairs Not Under Warranty
- Create Repair order 19536 for Customer 011.
- Add products to the order.
- Then go to Actions > Repair Product to record the serial number of the product being repaired.
- The Actions > Repair Product screen must be filled out in order to Save or Move to Shipping; a warning will appear if it hasn’t been filled out.
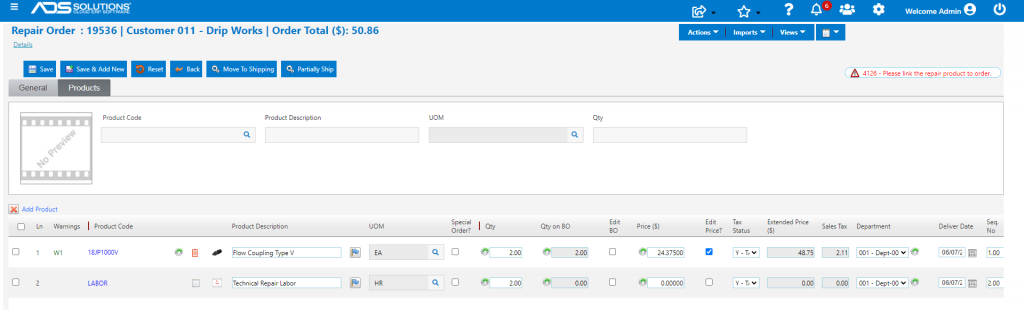
- Click on Actions > Repair Product.
- Order Date auto-populates into Repair Date field.
- Either enter/look up Product Code for the item being repaired.
- Then enter or look up Serial No; the lookup only shows Serial Nos for this product code with Status=Sold and Customer=011.
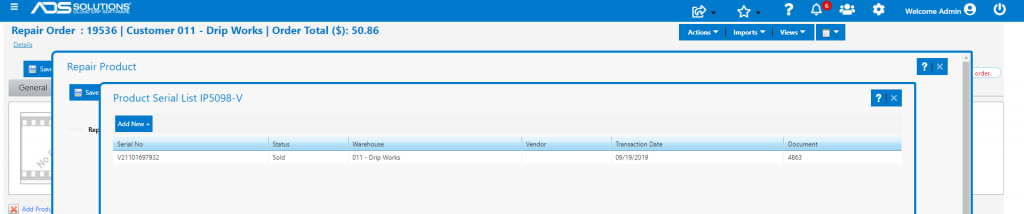
- To repair a product not purchased from the company, you can create a new Serial No.
- The Add New button redirects to Serial Master and opens in a new tab.
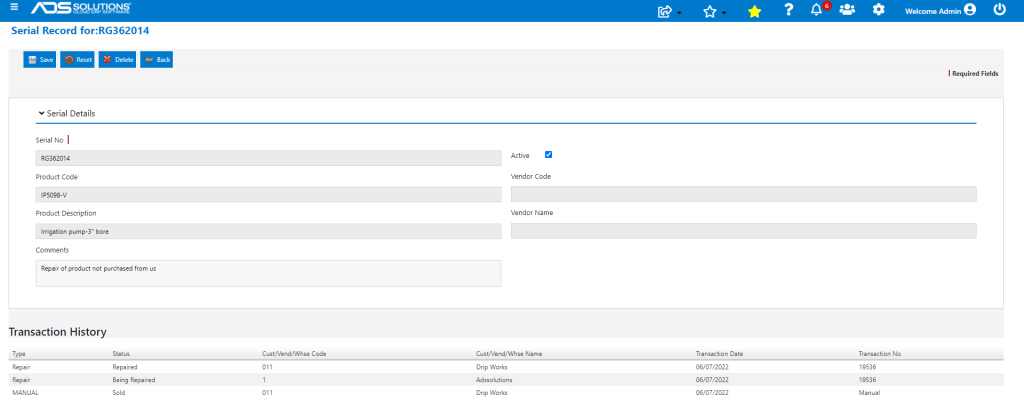
- Create New Serial No RG362014.
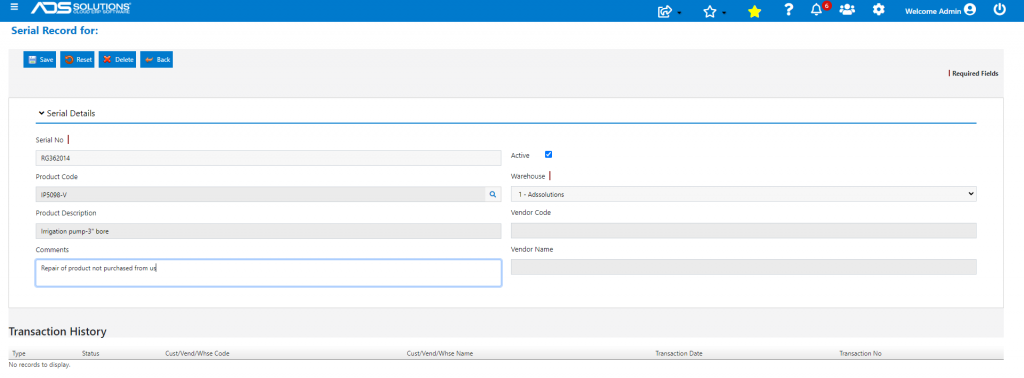
- Save the manual serial record, then return to Repair Order.
- Now new Serial No RG362014 brought in by Customer 011 is now available to select.

- Complete the Repair Product screen.
- Then when Repair is saved it will be shown in the List Orders screen.
- Open Order and move to Shipping.
- In shipping, additional products used in the repair can be entered.
- Enter a quantity for inventory product LABOR, if desired; or enter Labor directly on the general tab.
- Note if the LABOR inventory product is used, a monthly inventory adjustment can be used to net out labor charged against period payroll costs.
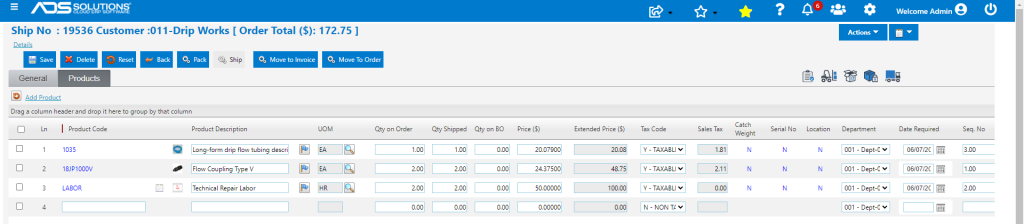
- When repair work is complete, move the repair to Invoice.
- The repair will now show in the List Invoices screen and payment may be collected.
- The Serial record captures the history of the transaction from the Customer bringing in the product for repair through completion of the repair.
- By looking up the serial record transactions all the details of the repair performed may be accessed.
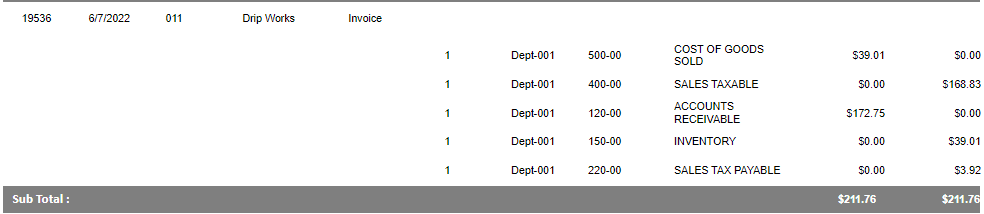
- Once invoiced, the repair is posted to the GL just as with any other invoiced order.
- GL Posting of Repair:
- The product being repaired (IP5098-V) does not come into the GL Posting.
- Repair components are recorded as sales or to some other category GL account.
- Repair components will be costed and come out of inventory at average cost.
- Labor can either be treated as an inventory product then zero’ed out at end of month to offset payroll, or costed at zero and picked up in full through payroll as a period cost.
Repairs Under Warranty
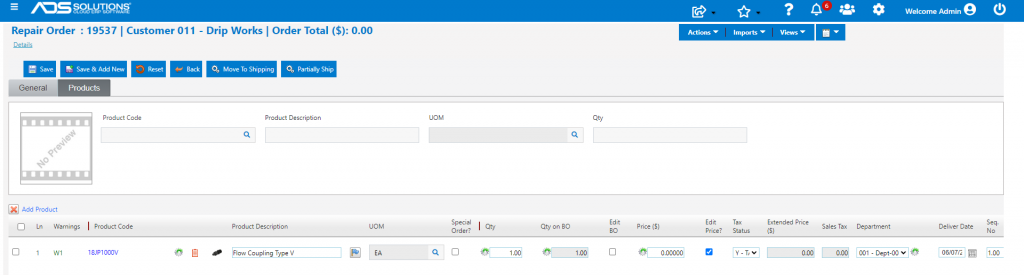
- Create Repair Order 19537, but this time select Warranty.
- Now edit price to zero and move to shipping.
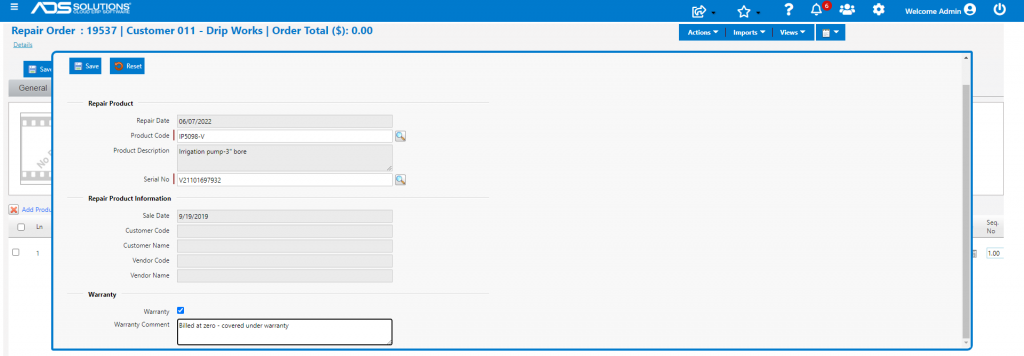
- On the Repair Product screen, select the Warranty checkbox and note that item is repaired under Warranty as well as any other details required by the Vendor.
- Then move order to shipping, complete the repair and then move to Invoice.
- This will create a zero invoice for the Customer detailing the products used/replaced in the repair.
- The GL Posting will show zero on the sales side, but will record the cost of the repair products.

- The product’s Vendor can then be billed for work performed under warranty.