
Accolent ERP allows for defining a population of Customers and/or Prospects and their associated CRM Contacts to receive a CRM blast email. The CRM email template may be created and edited as desired in Accolent ERP using a full HTML editor. The CRM email can contain a file specified as an attachment, although this is not good email marketing practice. To physically send CRM blast emails, you will need to connect to a blast email platform like Twilio SendGrid. The Accolent ERP email credentials are for transactional emails only, since any blacklisting of blast emails as spam will cause serious AWS issues. When the list of recipients is finalized and the email template complete, user clicks Send to send the email to the defined population. The list of addressees may be exported as an Excel file.
Edit CRM Email Template
- Go to Settings > Printing & Sending > Email Templates and select CRM Email.
- Click the Search button on the RHS of the HTML Editor screen to get a list of available variables that can be inserted into the email.
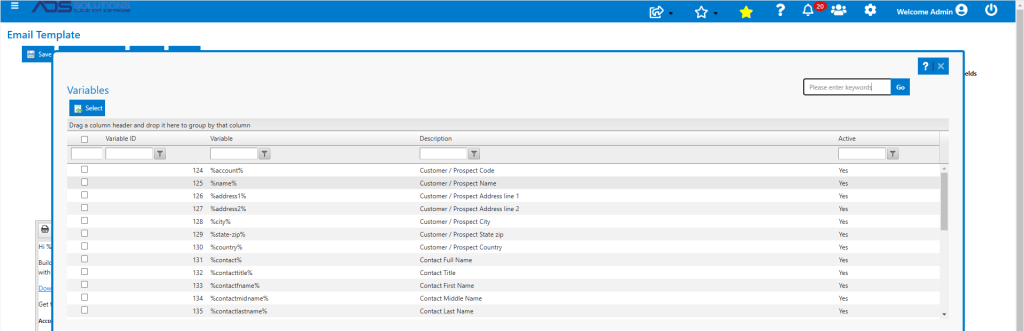
- Use the provided variables to insert fields into the email.
- Click the Select button to browse to and attach a file, if desired, that will be sent as an attachment to the email or include a website link in the body of the email.
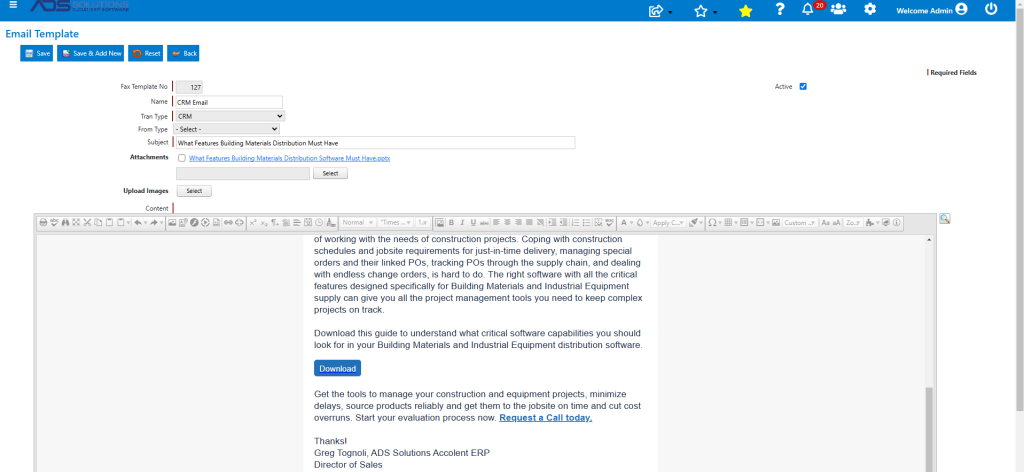
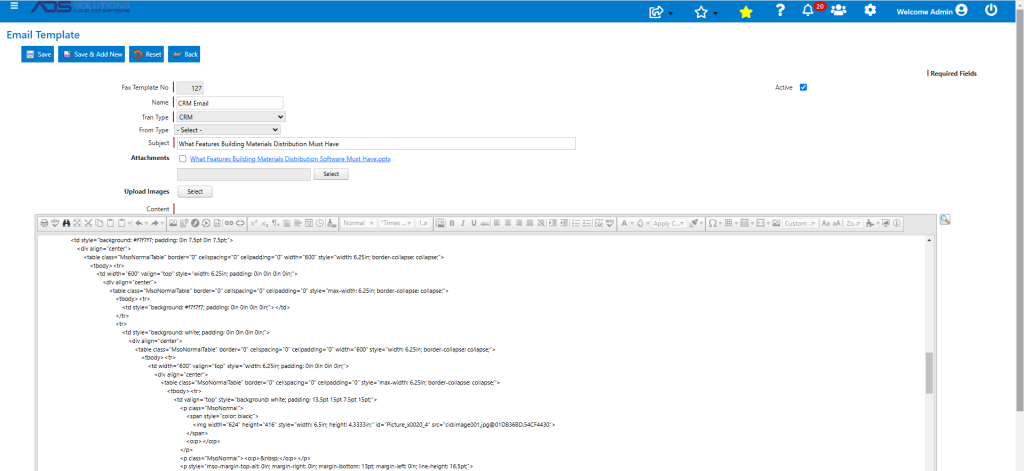
- You can also use the HTML editor to drop in properly formatted HTML code.
- When satisfied, save the template.
Select Addressee Population
- Go to CRM > Send CRM Email to select the population of addressees.
- Select All, None or a defined List of Customers or Prospects or select by Customer or Prospect Type.
- To select within these choices, filter by User Choice 7 on the Customer and Prospect record – this field will always be used as a CRM selection field.
- For example, go through the List Customers and List Prospects screens and mark all that are to receive the blast email with the Campaign No or Code (e.g., A052020); then select from All Customers and All Prospects with the value “A052020” in the User Choice 7 field.
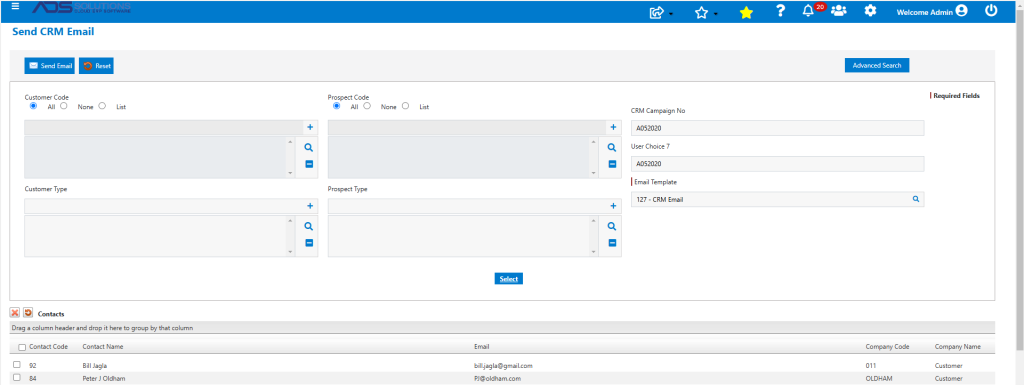
- Once complete, click Select to populate the selection to the screen grid.
- A separate grid row will be created for each Contact, marked to receive CRM Emails, that is associated with the selected Customers or Prospects.
- For example, Customer 011 has these associated Contacts:
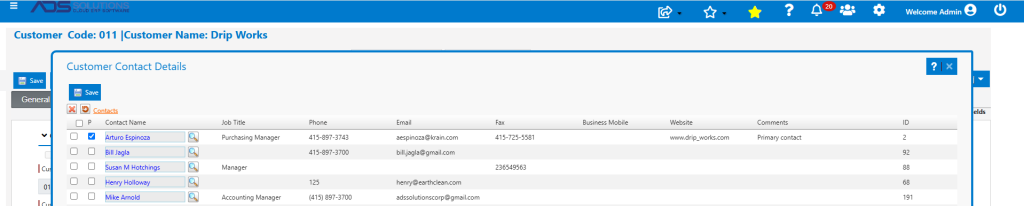
- Each of these Contacts that are marked to receive CRM Emails will be included in the grid.
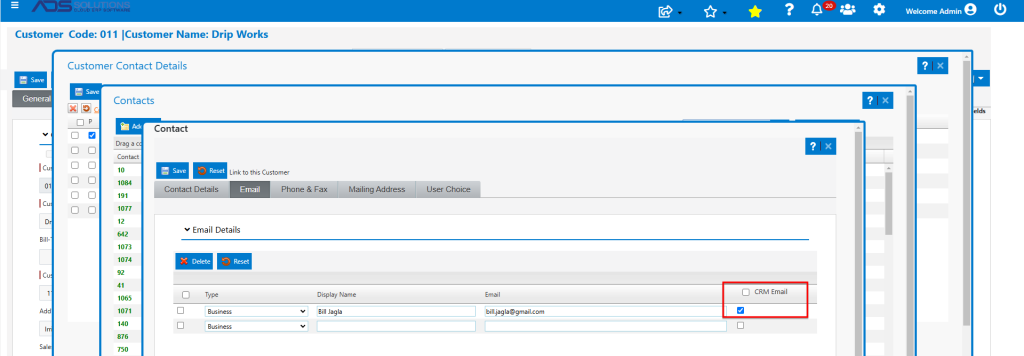
- Once the grid is populated, Names may be selected and removed from the grid as desired.
- When done, click Send Email.
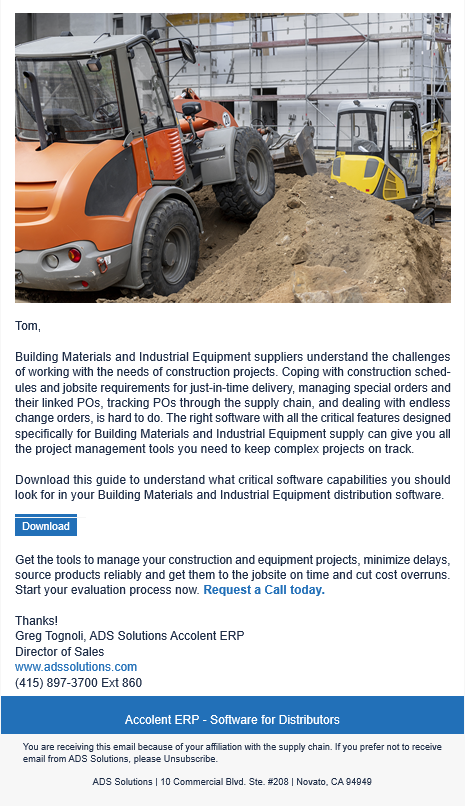
CRM Email
- The formatted emails will be sent and will show up in the recipients’ inboxes as follows:
Tracking Sent Emails
- Go to CRM > List Sent CRM Emails, then click Generate Report to see a list of all sent emails.
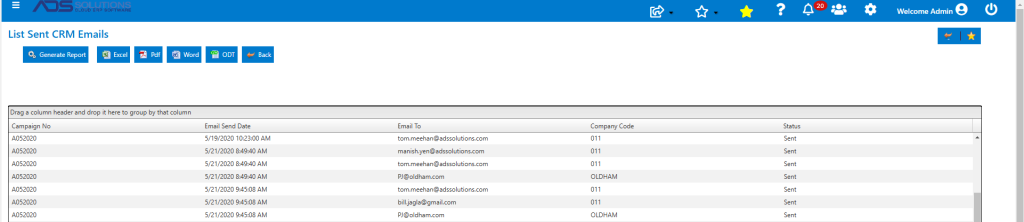
- The records may be sorted by Campaign No (User Choice 7 data), Email Sent Date, To Email Address, or Company Code.
- Click on the Excel button to get an Excel download of all emails sent.
- These tools give you the ability to create and manage outbound email campaigns.