
Purchase orders (POs) are used to buy products from vendors. The list of purchase orders shows basic information for all purchase orders with an option to create a new purchase order or open an existing PO. POs can also be created directly from the Create Purchase Order option. When a PO is created it is in status “open” until it is fully received through the Receive PO option. Once a PO is completely received, the PO is “closed.”
List Purchase Orders
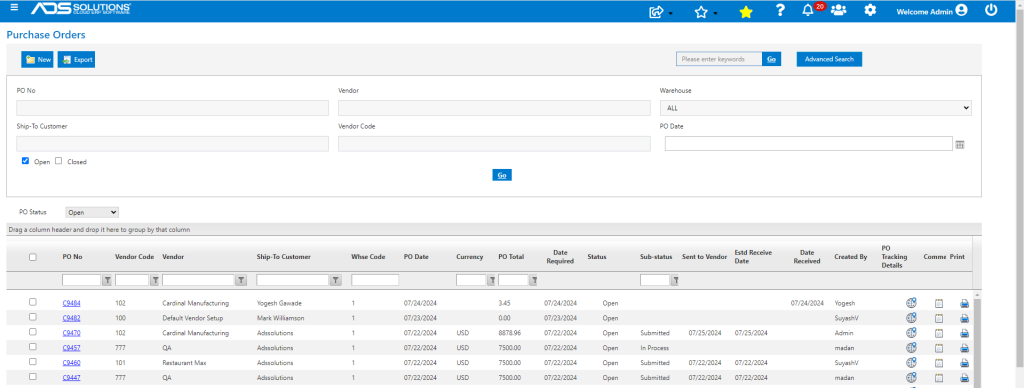
- To see a list of POs or create or view a PO go to Purchasing/Vendors > Purchase Orders > List Purchase Orders.
- By default, the List Purchase Orders screen shows a complete list of Open POs.
- To change the PO Status, open the Advanced Search screen and select Open or Closed or both.
Create Purchase Order
- Use the menu to go to Purchasing/Vendors > Purchase Orders > Create Purchase Orders or click New on the List Purchase Orders screen.
PO Header Tab
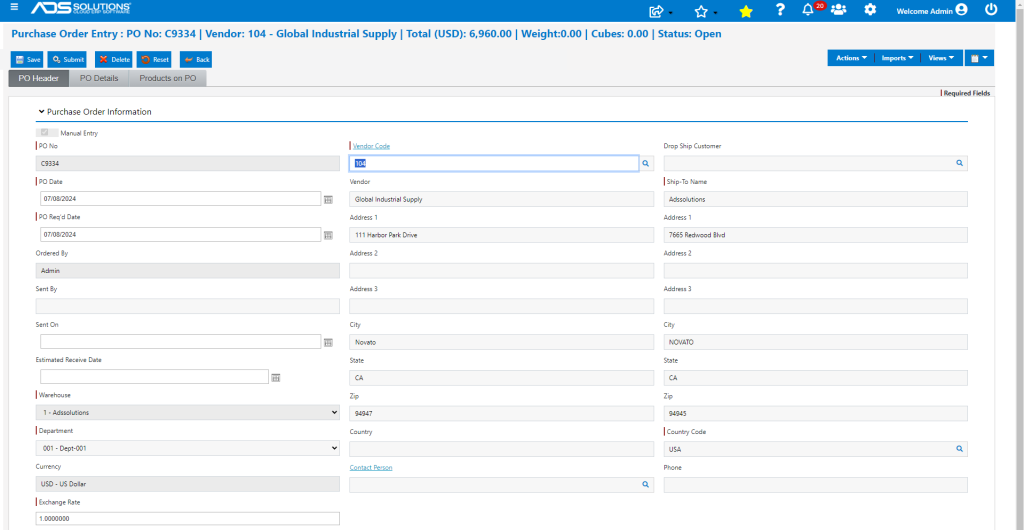
- The PO Header tab includes general details about the purchase order.
- The PO No can be auto generated or manually entered.
- After a PO No is created, and the Vendor selected, many fields will automatically show the value defined in the Vendor’s record (e.g., the warehouse is determined by the choice of vendor). These selections can be changed, if needed.
- If this a drop ship, enter the Customer code and the customer name and address will be used in the Ship-To Name and address fields. If the drop ship is to a non-customer or a special address, manually type the name and address in the Ship-To Address. By entering a drop ship Customer code all the lines on the PO will be marked as special order items requiring a link to a customer order.
PO Details Tab
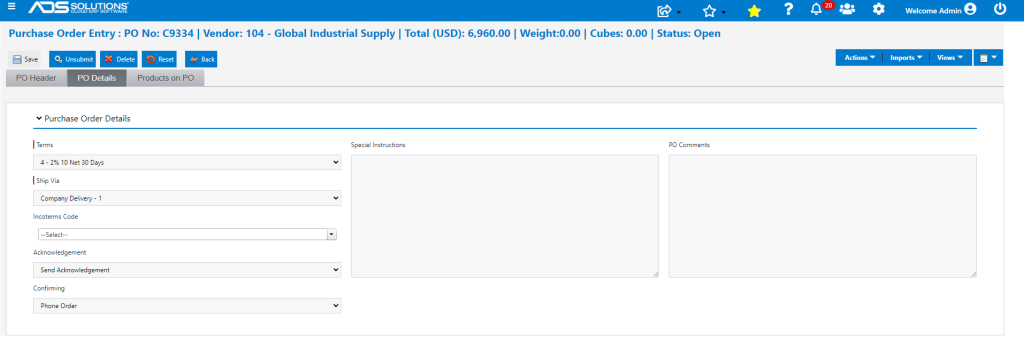
- The PO Details tab includes the terms, shipping and confirmation details for the purchase order.
- The Terms and Ship-Via fields populate from the Vendor.
- Select the Incoterms code that applies. This is used mainly for international commerce and designates where title to the goods passes from seller to buyer.
- Indicate whether Acknowledgment of vendor’s receipt of purchase order is required or not.
- Also indicate whether this is an original PO or a written confirmation of an earlier verbal order.
- Special Instructions that apply to the entire purchase order can be entered. PO Comments will default in from the Vendor but may be added to or edited as needed.
Products on PO Tab
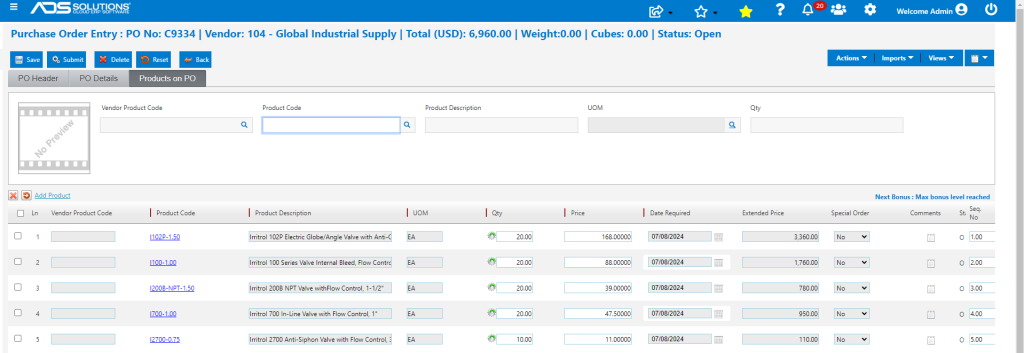
- Click on the Products on PO tab, to enter the line items on the PO.
- Add the vendor product code or the product code, quantity, price and other information to create each PO line.
- Click the gear icon next to the Qty field to see Product and Inventory information for the indicated product and warehouse.
- The Special Order dropdown indicates whether an item will require a link to a sales order. If the value in the Special Order field is Yes, a link to a sales order will be required before the PO can be completed.
Saving and Submitting a PO
- Often, POs are created and added to over some extended period of time, before they are finalized and sent to the Vendor.
- While a PO is being created it should be Saved as it is being entered. This will record the PO in Open-In Process status.

- While In Process the PO can be opened and added to as needed.
- When it is complete, click the Submit button to finalize the PO and print it and/or email it to the Vendor.
- The PO now has the status Submitted and no further changes may be made without first clicking the Unsubmit button.
- This will also update the Sent By, Sent On and Estimated Receive Date fields on the PO.
- Note: If a PO is “Unsubmitted” and modified in some way then Submitted again, it will need to be resent to the Vendor and the Vendor advised of the changes.
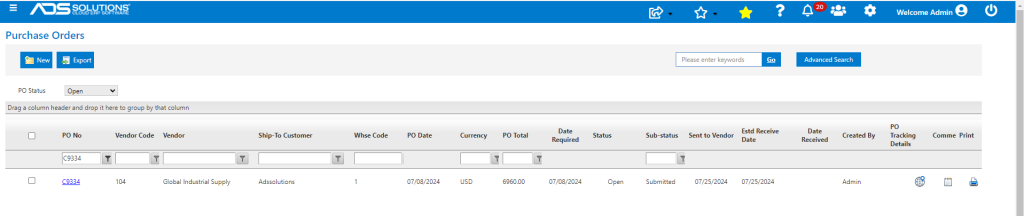
- The only field that can be changed on a Submitted PO is the Estimated Receive Date. By clicking on the Edit icon, the Estimated Receive Date can be changed and saved as more information becomes available.
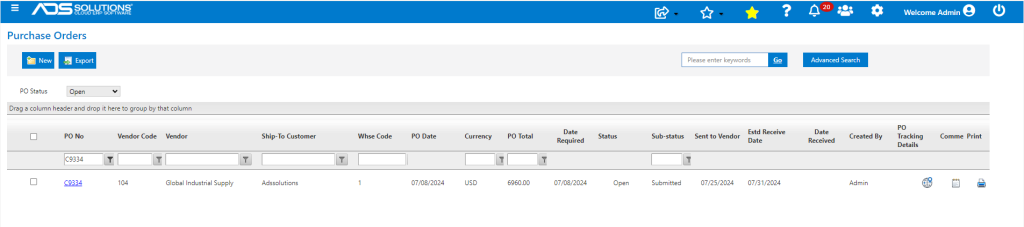
- The updated Estimated Receive Date will be displayed on the List POs screen.
PO Tracking
- A PO may be packed in one or more Containers or Pallets, and then shipped.
- The shipment details such as Vessel, Departure Date, Departure Port, Arrival Date, Arrival Port, etc., can be tracked through the Container.
- The PO tracking icon on the List POs screen lists the Containers related to that PO.
- The Comments icon on the List POs screen contains user entered comments as well as system generated comments related to the PO.