
Accolent ERP allows user to create Purchase Orders (POs) to purchase goods from Vendors. As products are being added to a PO, the PO may be saved and designated as In Process. When a PO is complete and sent to the Vendor, it is recorded as Submitted. POs are considered Open prior to the receipt of goods from the Vendor or Closed after the PO has been received. Product prices on POs can be set to default in at Alternate Cost, Standard Cost, Special Cost or at Last PO Price, but may be overwritten.
Creating a PO
- Select Purchasing/Vendors > Purchase Orders > Create Purchase Order.
- On the General tab, use the Manual Entry checkbox to enter a PO No or allow the system to auto generate it.
- Default PO Date is today or enter/select another date.
- Enter or lookup the Vendor Code and most of the information on the General tab will auto populate based on the settings on the Vendor.
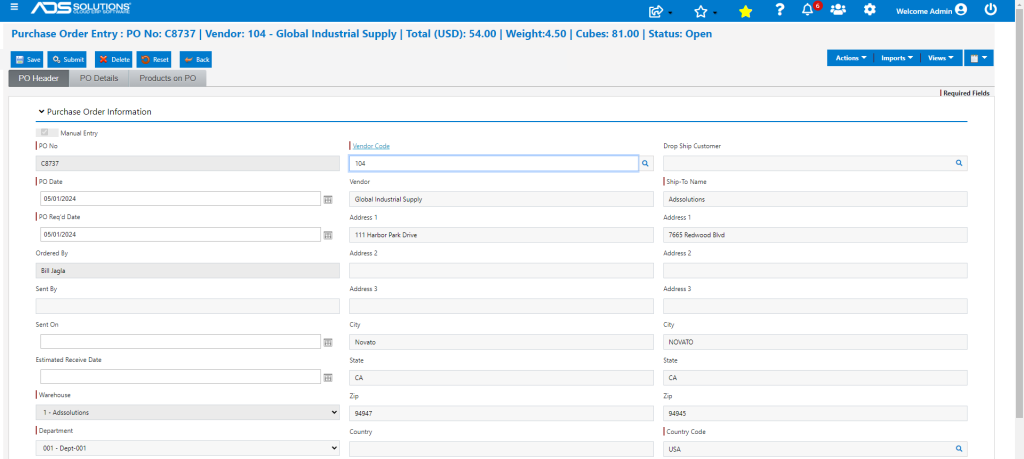
- On the PO Details tab, add any Special Instructions or PO Comments.
- Click on Products on PO tab.
Adding Products
- Products are added on the Products on PO tab.
- Product prices on POs default in based on Settings > Application Defaults > Purchasing/Vendors > V102-1, which should be set as a global configuration.

- Enter or lookup either Vendor Product Code (if set up in the product record) or the Product Code.
- The Description, UOM auto populate from the product record.
- Enter Qty and price will populate based on setting V102-1.
- If set up in the product record, Cubes, Weight and Freight will all default in.
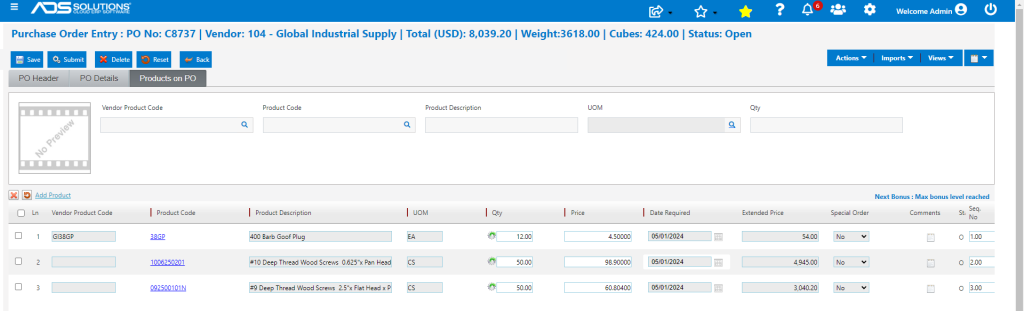
- The default price on the PO may be overwritten if desired.
- Click on the Comments icon to add PO Line Item Comments if desired.
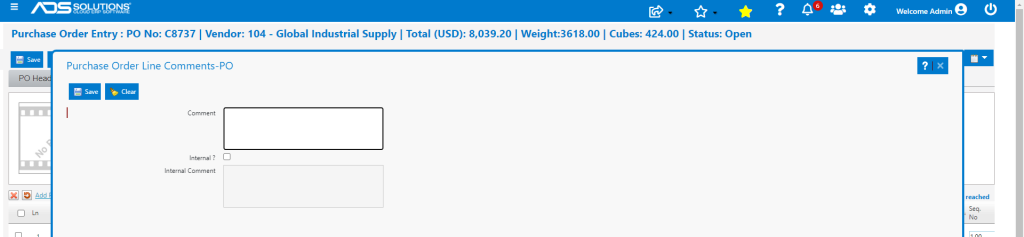
- When done click Save to save PO No C8737.
PO Statuses and Sub-Statuses
- Prior to receipt from the Vendor, of all of the goods on the PO, the PO is considered to have status of Open.
- When all of the goods on the PO are either received or cancelled, the PO has the status of Closed.
- The Save button saves the PO with a sub-status of In Process.
- While in sub-status of In Process, the PO may be opened and added to as many times as necessary – many users build POs over a period of days or weeks, which requires saving each time after adding products.
Sending a PO to the Vendor
- When the PO is fully completed, use the Submit button to change the sub-status to Submitted and mark the PO as sent.
- The sub-status of Submitted signifies that the PO cannot be added to as it is already with the Vendor and being filled.
- The Submit button automatically records the date Sent and by whom and will calculate the Est’d Receive Date as the Sent Date plus the Lead Time on the Vendor.
- Then click on the print button to bring up the email/fax default set up for the Vendor; from this screen, user can print or email and add more addresses.
- The printer selections and email addresses will prefill from the Email/Fax Defaults.
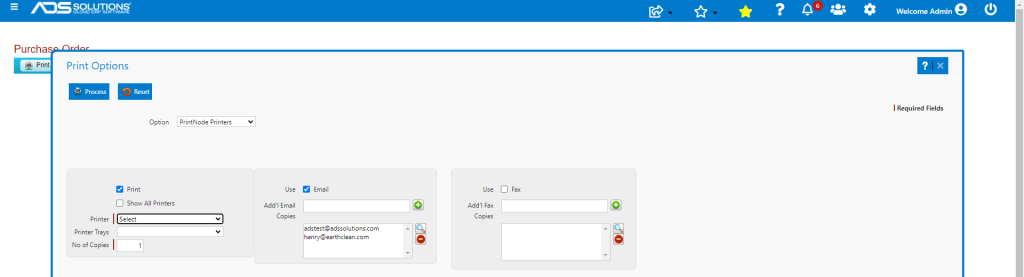
- Click Process, creates the email with the PO as an attachment and sends this email to the vendor contacts.
- Then redirects to List POs screen.

Unsubmit Button
- If after a PO has been sent to the Vendor, using the Submit button or otherwise, the PO has to be amended based on new developments, use the Unsubmit button to allow editing of the PO.
- Unsubmit changes the PO status from Open/Submitted back to Open/In Process and clears the Sent On, Sent By and Est’d Receive Date fields.
- The Unsubmit button DOES NOT issue a retraction of the email and PO previously sent to the Vendor – this retraction must be done manually.
Updating Estimated Receive Date
- The Est’d Receive Date may be updated at any time by opening the PO and changing the date selection.
- Click on the Edit icon next to the Est Receive Date, then Save.
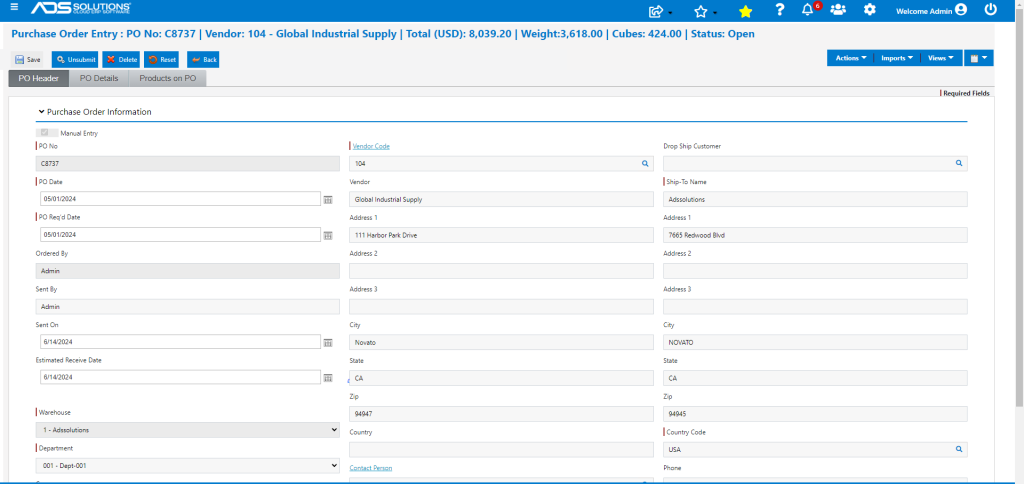
- This will update the PO itself and also displays on the List POs screen