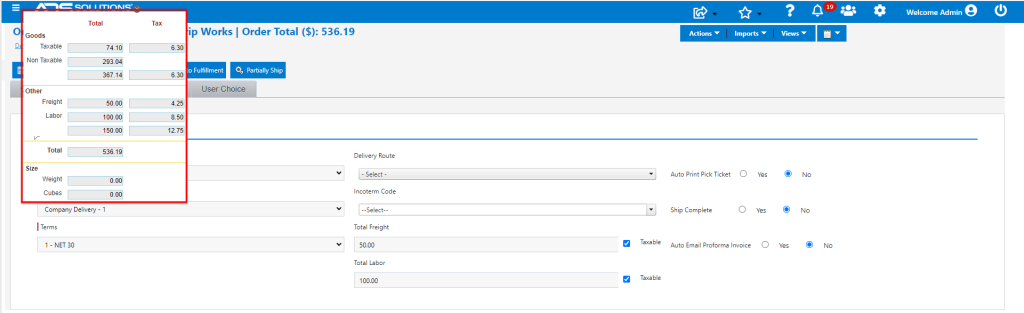
Accolent ERP calculates sales tax based on a tax table set up by the user. The user needs to create tax jurisdictions by State, specify nexus and, if desired, split the total tax rate for the tax jurisdiction into its State, County, City and Local components. The user also needs to specify whether to Tax by Warehouse which depends on the Ship Via and whether the State is a Tax-by-Origin or Tax-by Destination State. Also depending on the State, whether in that State, sales tax is charged on freight and labor. These settings will default the sales tax calculation in an order, but the user may override line item by item if desired.
Tax Jurisdictions
- Go to Settings > Value Lists > Other Value Lists (M – Z) > Tax Jurisdictions.
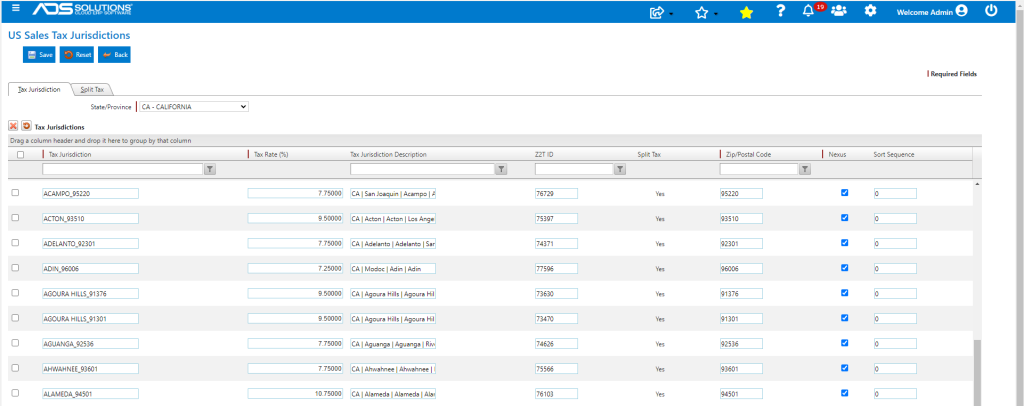
- Set up Tax Jurisdictions by State and remember to select the Nexus checkbox where appropriate.
- For sales tax purposes, Nexus means conducting certain business activities in a state that requires the seller to collect and remit sales tax in that state.
- Nexus creating activities include having a physical presence or reaching a certain sales threshold in that state.
- Rules for establishing Nexus vary from state to state and should be reviewed with sales tax professionals.
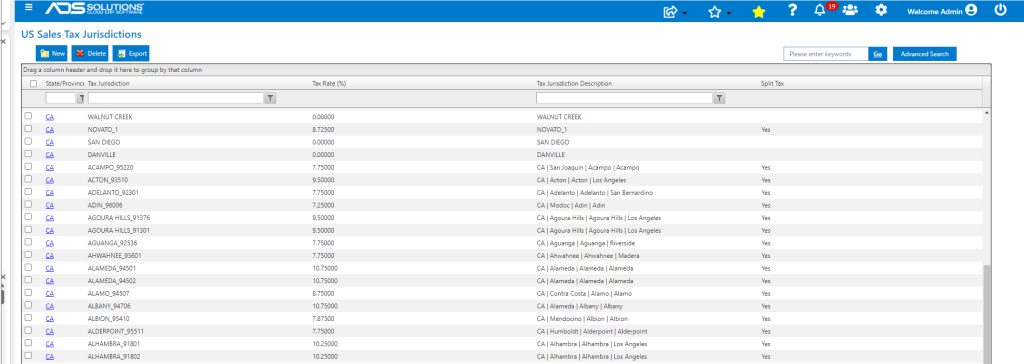
- These are the CA Tax Jurisdictions (these were imported from Zip2Tax).
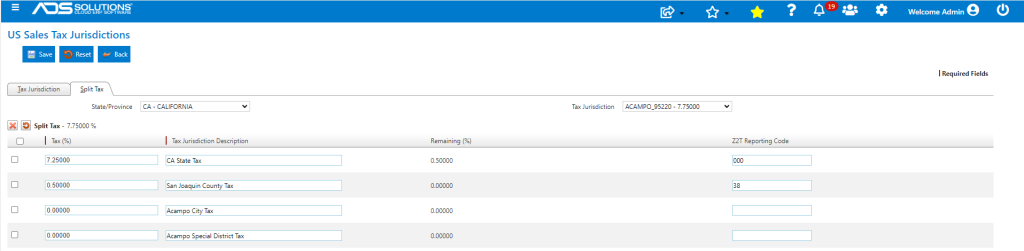
- Set up Tax Splits for a Tax Jurisdiction, if desired.
Freight and Labor
- Go to Settings > Value Lists > Other Value Lists (M – Z) > States.
- On the State screen, select whether Freight and/or Labor are taxable in that State.

Tax by Warehouse
- Go to Settings > Value Lists > Other Value Lists (M – Z) > Ship Vias.
- On the Shipping Methods screen, based on the Ship Via, specify whether to Tax by Warehouse or not.
- Typically, you would use Tax by Warehouse if:
- The State is a Tax-by-Origin State,
- The Ship Via is for a Customer to pick up at the Warehouse, or
- You are making over-the-counter sales from the Warehouse.

Sales Tax Jurisdiction
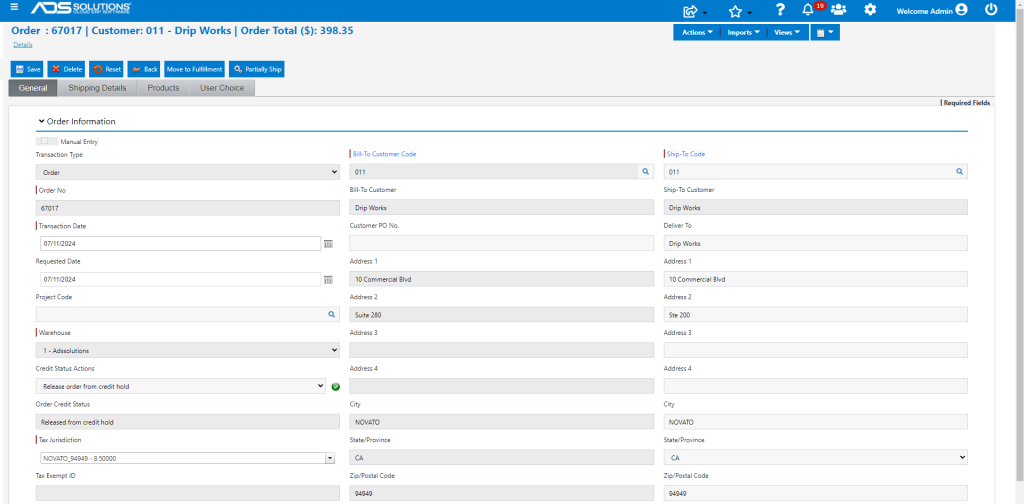
- In order entry, the following rules are used to populate the Tax Jurisdiction field:
- The selected Ship Via determines the Tax by Warehouse setting.
- If Tax by Warehouse setting is Yes, use the selected Warehouse Tax Rate.
- If Tax by Warehouse setting is No, use the Ship-To Customer’s Tax Rate.
- If an Immediate Invoice use the selected Warehouse Tax Rate.
Set Customer and Product as Taxable or Non-Taxable
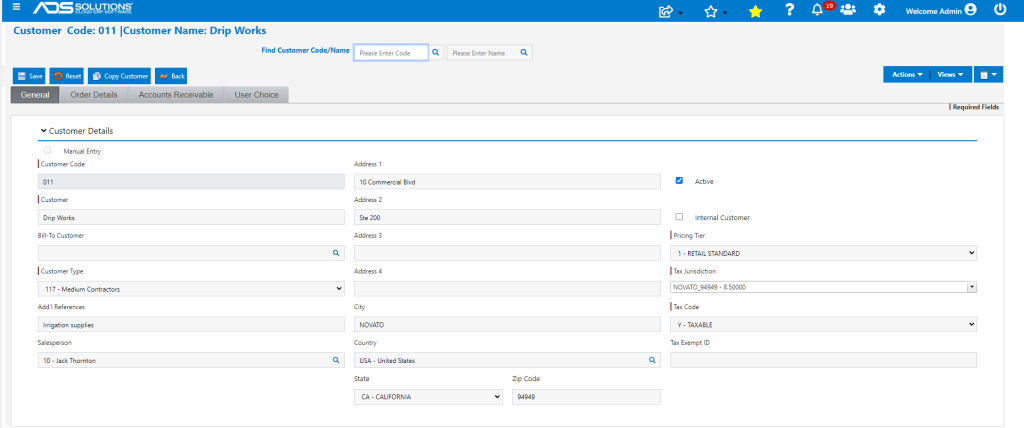
- Select a Customer Tax Code on the Customer master record that is taxable or non-taxable.
- Non-taxable customers generally include government agencies, some nonprofit organizations, and merchants purchasing goods for resale.
- Sellers may be required to collect a valid exemption or resale certificate to validate each exempt transaction.
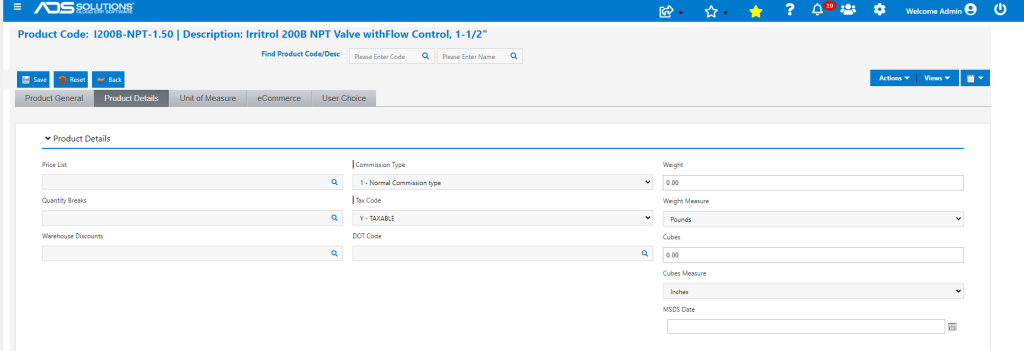
- Set Product Tax Code on the Product master record that is taxable or non-taxable.
- Non-taxable goods may include categories such as medicines and medical goods or goods that are purchased for resale.
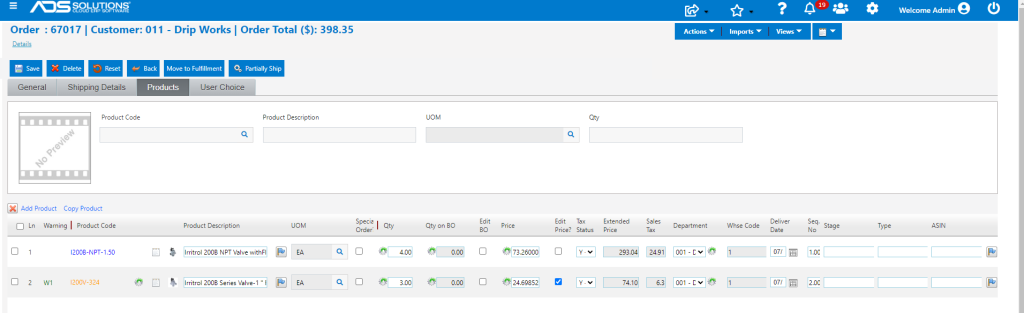
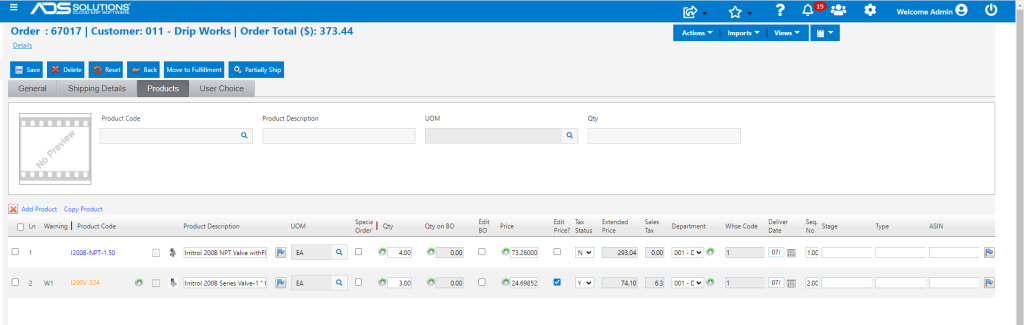
- Based on the settings for Customer and Product the dropdowns on the Product Grid rows will default as follows:
- If Customer is Taxable, and Product is Taxable, default will be Y-Taxable, and
- If either Customer or Product or both are Non-Taxable, the default will be N-Non-Taxable.
Overriding Product Line Defaults
- Users can accept the taxable or non-taxable default or override on a line item by line item basis.
- If the setting is Y-Taxable sales tax is calculated on that line item, if N-Non-Taxable then sales tax is not calculated.
- E.g., change line item 1 setting to N-Non-Taxable.
Overriding Freight and Labor Defaults
- Freight and Labor fields read the tax settings from the State Value List.
- If a setting is taxable the Taxable checked box will be checked or vice versa.
- Add Freight $50.00 and Labor $100.00.
- Order total increases from $373.44 to $523.44 since Freight and Labor are marked non-taxable on the States Value List.
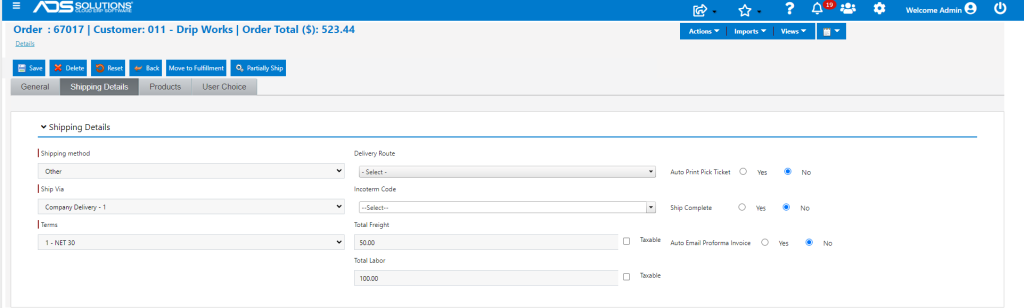
- To override the States Value List settings either check or uncheck the Taxable field as needed.
- Make Freight and Labor Taxable, and order total increases to $536.19.