
In Accolent ERP, once an order is moved to fulfillment, it is available to the warehouse to be picked, packed and shipped. When complete an order is Shipped and this marks the end of the fulfillment phase. At this point, the order can be moved to an invoice. Once invoiced the revenue recognition process is completed, and the transaction is posted to the General Ledger.
Fulfillment
- Go to the List Fulfillments menu option at Sales > Fulfillment > List Fulfillments and select a transaction or Sales > Fullfillment > Fulfill Order and enter the transaction no
Fullfillment General Tab: Fields
| Fields and Functions | Description |
| Transaction No | Automatically-assigned transaction number |
| Ship Date | Ship date that will appear on the transaction |
| Order Date | Order date that will appear on the transaction |
| Entered By | User who entered the order |
| Bill-To Customer | Customer that will appear in the Bill-To section of the transaction. The Bill-To customer will be expected to pay for the transaction |
| Ship-To Customer | Customer or location where the goods will be shipped. Default tax jurisdiction is based on this customer. You can choose to select a customer that has been designated as a Ship-To customer for the Bill-To customer or you can choose to manually enter a name and address |
| Processing Options | Processing options indicate how the transaction should be handled. Select whether to ship complete, create split terms, or apply payment. |
| Ship Complete | If a Customer doesn’t accept partial orders, uncheck the Accept partial shipment checkbox on the Customer record. Additionally, user can designate an order as Ship Complete on the order entry screen.
During shipping, user will be prompted that the order is flagged as Ship Complete, but the user can change this by unchecking Ship Complete. If there are no backordered lines, the order will be confirmed normally and the invoice created. If there are backordered line items, the whole shipment will be moved to backorder. As backordered products are received user can at any time select a population and Evaluate BOs. A Ship Complete order will only indicate that the BO “Can be Filled” when all Line items can be filled. |
| Split Terms | If checked this allows the invoice to be split into multiple installments. Clicking on Move to Invoice brings up the Split Terms screen where the split can be defined |
| Apply Payment | If checked this will bring up the payments screen when the order is ship confirmed |
| PO Number | Customer PO or Reference No to aid in identifying the order |
| Ship Via | Shipping method for this order |
| Warehouse | Warehouse to provide goods for this order |
| Terms | Terms on the order |
| Salesperson | Salesperson credited with the order |
| Tax Jurisdiction | Tax jurisdiction for the order. A combination of the customer’s tax code, the assigned tax jurisdiction, and the tax code assigned to the products on order will determine whether tax will be charged and at what rate |
| FOB Code | FOB Code that specifies obligations as between buyer, seller and shipper |
| Weight | Weight of shipment. Access the Shippers Entry screen to allocate items on the transaction to specific boxes and get tracking numbers and print labels for boxes |
| Cubes | Cubes of shipment |
| Freight | Dollar amount of freight charged for this transaction. Enter here or drive from Shippers Entry screen |
| Labor | Dollar amount of labor (or handling charge) for this transaction |
| Tax Rate | Percentage of tax being charged |
| Non-Taxable Amount ($) | Amount of the transaction total that is not subject to tax |
| Taxable Amount ($) | Amount of the transaction total that is subject to tax |
| Tax | Dollar amount of tax to be added to the transaction |
| Total ($ | Total price of the transaction |
Fulfillment Product Tab: Fields
| Fields and Functions | Description |
| Delete Line(s) | Remove checked lines from a transaction. If all lines are removed, the transaction will be cancelled |
| Reset Lines | Reset all unsaved values on order lines |
| Pack/Ship | Click to pull up the Shippers Entry screen |
| Move to Invoice | Click to ship confirm the order and move it to an invoice. This bills the customer, creates the AR record and posts the transaction to the General Ledger |
| Product code | 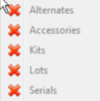 Code that identifies the product. An entry in this field is required. Use the Look Up screen to find the product, if needed. Right click the product code entry field to see a list of options related to the product. The field will be outlined in orange to notify the user if an alternate or accessory product is associated or if kits, lots, or serial numbers require values Code that identifies the product. An entry in this field is required. Use the Look Up screen to find the product, if needed. Right click the product code entry field to see a list of options related to the product. The field will be outlined in orange to notify the user if an alternate or accessory product is associated or if kits, lots, or serial numbers require values
Click the Comments icon Click the Product Details icon to view additional product information including the product image |
| Description | Description used to identify the product on the PO. Modify the description as desired. Product descriptions may be up to 200 characters. Multiple descriptions are available by clicking the Multiple Product Description icon  |
| UOM | Sales unit of measure. Enter the desired sales units or use the Look Up button to access the Unit of Measure screen to see which units have been defined for this product |
| Qty on Order | Quantity ordered. Enter the quantity you wish to order for the units specified |
| Qty Shipped | Quantity shipped |
| Qty on BO | Quantity that will be backordered when backorders are processed. Until that time, the backorder is pro-forma. Backorders are processed when an order is ship confirmed. This prompt does not appear if either the customer or product is marked indicating that backorders are not accepted |
| Price/PrU | Price for the selected unit of measure after applying all the customer’s earned discounts |
| Extended Price | Extended price for this quantity of products at this price. Quantity multiplied by price to show the line item price |
| Serial No | Serial numbers must be added to the Serial No screen for serialized products. A “Y” indicates that serial numbers are needed. Click the link to access the screen |
| Lots/Locations | Locations must be added to the Lots/Locations screen if the Track Locations checkbox on the product is marked to record inventory by location. User will have to allocate the quantity being shipped to the various locations associated with the product. Once the quantity shipped is accounted for the Locations “Y” indicator will change to the number of items being shipped
All Lot Controlled products must also have Track Locations checked. If the product is also Lot Controlled, the Lots/Location screen will also require entry of all of the Lots with their associated Locations |
| Department | Each line item may be allocated by department. Allocating sales by department is valuable for sales analysis and General Ledger purposes |
| Date Required | Date Required by line item. This field allows you to specify a different date required for each line item |
| Tax Code | Tax code for this line item |
Fulfillment Actions Menu
- Access Fulfillment Actions Menu from Sales > Ship Confirmation > List Fulfillments > select a transaction > Actions.
Consolidate Order
- This feature provides the ability to consolidate several transactions into one.
- Select the type of transaction to consolidate and look up or directly enter the transaction no.
- No changes are allowed on the items while being consolidated; once consolidated, changes are once again allowed.
- The following rules apply to consolidations:
- Only transactions for the same bill-to and ship-to customers can be consolidated,
- Transactions originating out of different warehouses cannot be consolidated unless the warehouse code is changed either in order entry or in fulfillment, and
- Transactions originating in one warehouse but shipped from another are eligible for consolidation.
Freight Rate Lookup
- Choose a shipping provider and request rates from that provider.
- You will then have the opportunity to add a surcharge and export selected services.
Linked Files
- Link files to the order to include related information with the order.
Take Payment
- Take payment on this shipping item.
Comments Menu
- Access Order Comments Menus from Sales > Orders > Create Order > comments icon

Printed Special Instructions
- Enter a comment.
- Select which forms the comment should print on.
- The printed comment will appear in the Special Instructions section of the selected forms.
Internal Notes
- Enter one or more internal notes.
- These will be recorded chronologically with the User ID of the person entering the note and the Date Entered.
- Notes and history will exist with the transaction through its complete lifecycle: quotes to order and can be viewed, edited, added to or deleted at any time.