
The Setup screen records some basic information that is used in the system. These areas should be populated during the initial set up.
System Settings
- Go to Settings > System Settings to see a list of existing system-wide settings.
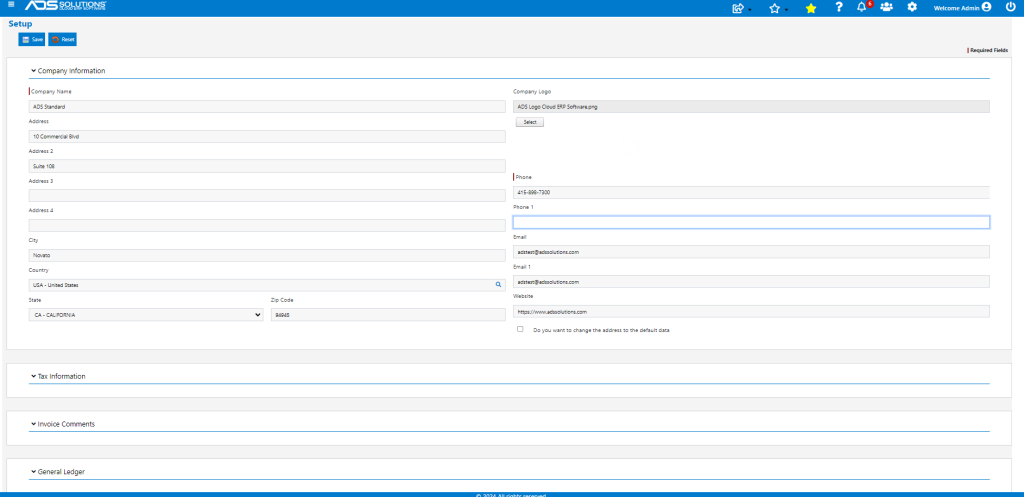
Company Details
- Basic company information that is used on financial documents and on-screen logo are set up in the Company section.
Company Details Fields
| Field | Description |
| Company Name | Company name. |
| Address1 and Address2 | Company address. Click the Expand button (an arrow) to show the second through fourth address lines. |
| City | Company city. |
| State | Company state. Select a state from the states defined on your Value List. |
| Zip Code | Company Zip Code. |
| Phone | Company main phone number. |
| Email address. Drop down to add another email address. | |
| Website | Website URL. |
| Company Logo | Browse to and select Company Logo file. |
Upload Company Logo
- A company logo file can be selected. PNG, JPG, and GIF file types are supported.
- Once uploaded, the logo will appear in the top left corner of the screen header.
- The maximum height and width dimensions are 40 pixels x 200 pixels.
- To see the uploaded logo, log out and log in again and you may need to clear the browser cache.
Tax Identifications
- Enter Federal and State tax IDs here for use throughout the system.
Invoice Comments
- Enter the message that will appear on all Invoice (e.g., “All sales are final. Any goods returned for credit must be received within 30 days of invoice date.”)
General Ledger
- Initialize the company’s fiscal year and set end of year date.
- Do not initialize the fiscal year without guidance from ADS Solutions.