
The Accolent ERP Self-Service Portal allows Customers’ employees (“End-Users”) to place orders, review the status of their orders, look up their prior transactions, review their Statements and pay invoices. The Self-Service Portal is a separate website that is linked to Accolent ERP and allows access to only those Customers and their End-Users that have been approved for Self-Service Portal access. Customers will get the same pricing, terms, shipping methods, etc., on the Self-Service Portal as they would get in Accolent ERP. The Self-Service Portal requires some initial set-up and configuration.
Onboarding Screen
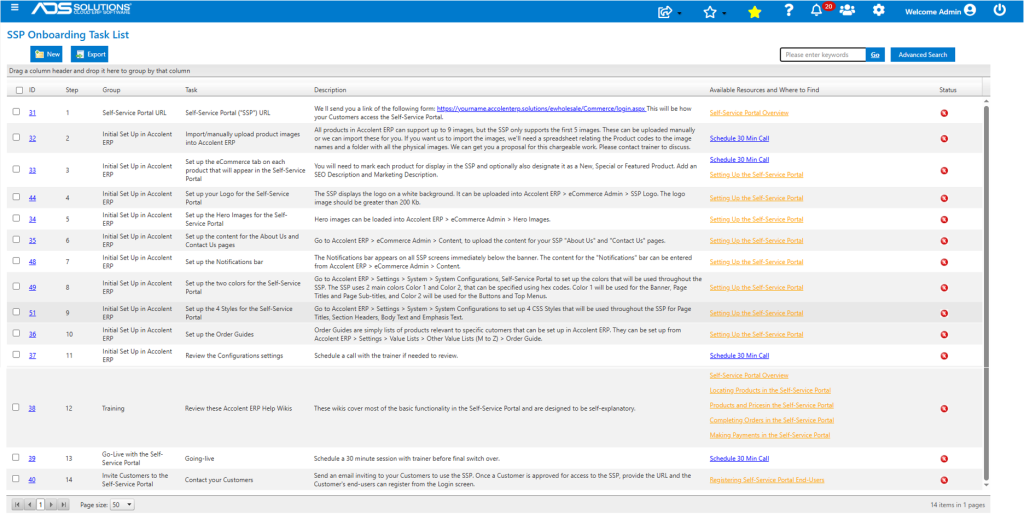
- Go to Accolent ERP > Utilities > Self-Service Portal Onboarding Task List.
- This screen lists the steps that should be followed to get the Self-Service Portal properly set up. The ADS Solutions Implementation Manager will use this screen to manage the Self-Service Portal set up and Implementation.
- This list of tasks should be completed before launching the Self-Service Portal and inviting Customers to use it.
Configuration Settings
- There are several Configuration Settings in Accolent ERP that control the appearance and behavior of the Self-Service Portal, that must be set up.
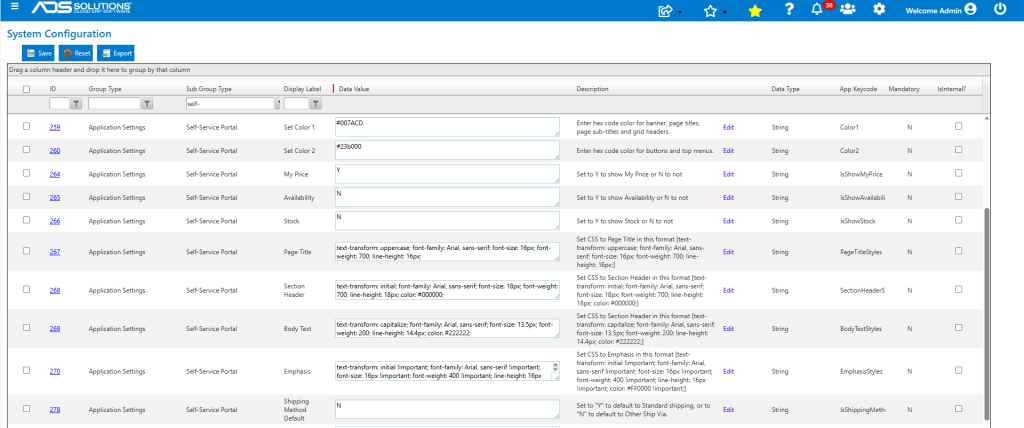
- In Accolent ERP, go to Settings > System > System Configuration and filter by sub-group Self- Service.
- Contact ADS Solutions to discuss how these 10 Configurations should be set up.
- Configuration Settings 259 through 270 (excluding 264, 265 and 266) determine the fonts and colors used throughout the Self-Service Portal.
- Configuration Settings 264 through 266 control the pricing display as well options to show availability and stock on the product.
- Configuration Setting 278 controls the default shipping method shown. This can be changed by the End-User on any order.
Hero Images
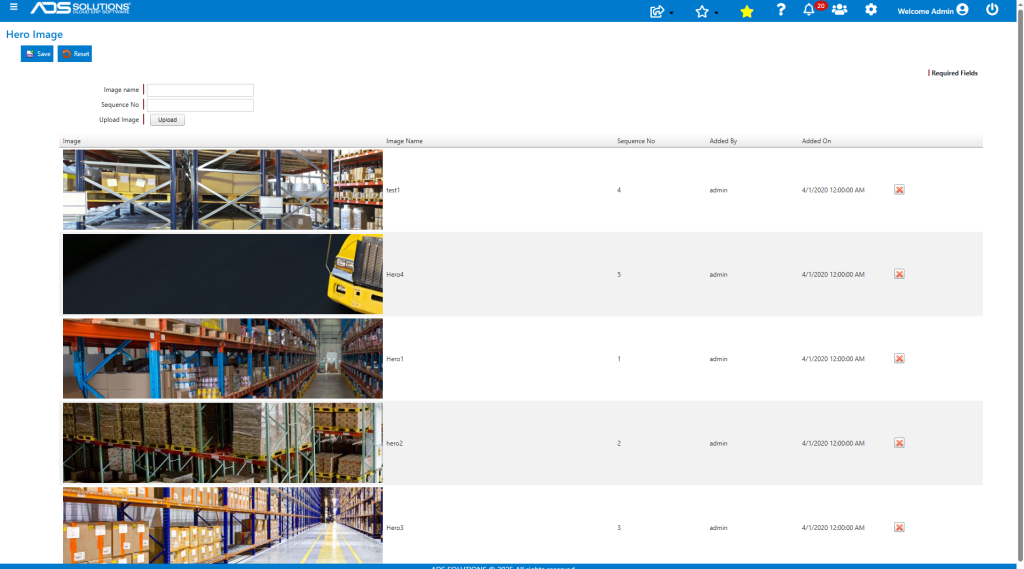
- Go to Accolent ERP > Settings > eCommerce Admin > Self-Service Portal > Hero Images.
- From the Hero Images screen, up to 5 images may be uploaded.
- Hero images should ideally be 1100 x 164 pixels and in the jpeg image format.
- If images of different dimensions are used, the system will resize the image to fit the horizontal dimension of 1,100 pixels, and then keeping the same aspect ratio, it will take a vertically centralized strip of 164 pixels from the image.
- From the Hero Image upload screen, set the sequence the images will display in.
- The timing of the carousel is set to 30 seconds per image by default; if desired, ADS Solutions can change this.
Logo
- The Self-Service Portal displays the Accolent ERP user’s logo at the top-left on a white background.
- This can be set in Accolent ERP > Settings >eCommerce Admin > Self-Service Portal > SSP Logo.

About Us, Contact Us, Notifications
- On the Self-Service Portal, there are 2 full-page screens About Us and Contact Us, and a Notifications field that need to be populated.
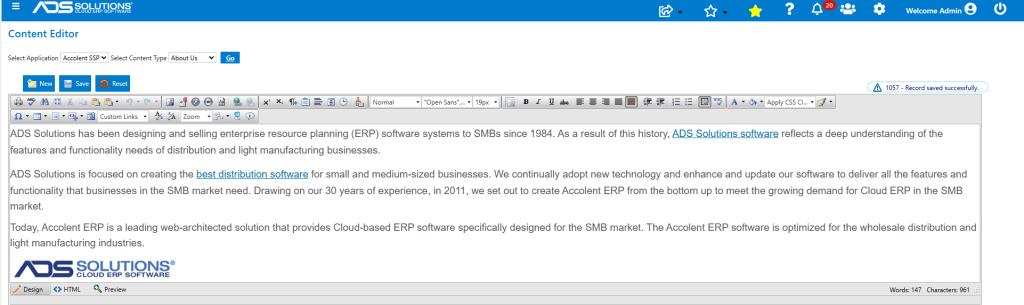
- All three of these can be accessed in Accolent ERP from Settings > eCommerce Admin > Self-Service Portal > Content Editor > select Content Type, then select from the dropdown and click Go.
- This opens a full HTML editor that can be used to create the content that will be displayed on the Self-Service Portal.
About Us
- On the Self-Service Portal, this page is accessed using the top-level links at the right-hand side of the screen.
Contact Us
- On the Self-Service Portal, this page is accessed using the top-level links at the right-hand side of the screen.
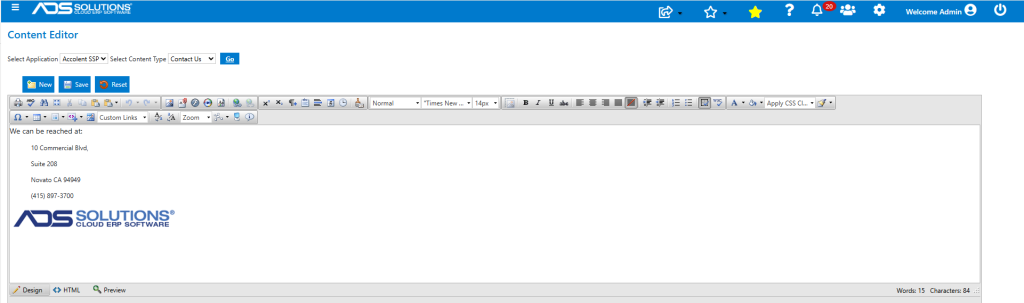
Notifications
- On the Self-Service Portal, the Notifications field appears immediately below the banner on all screens and is used to display a message to Self-Service Portal users.

Set up Products to Display
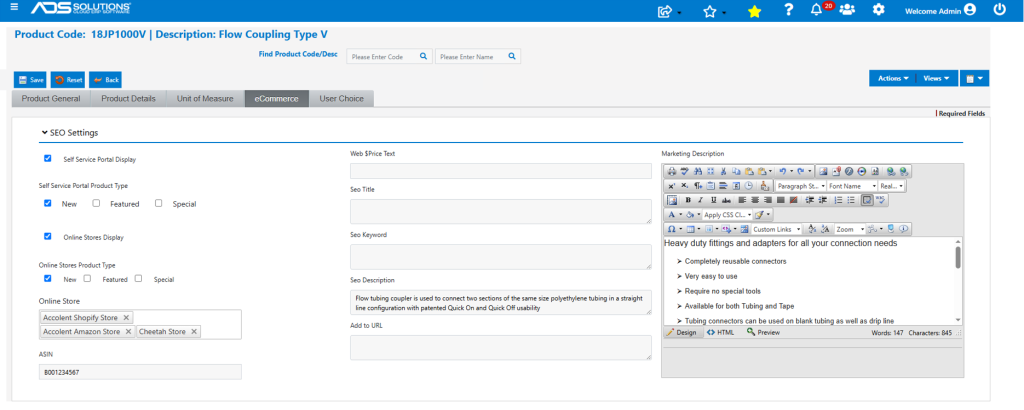
- Products already in Accolent ERP may be selected for display on the Self-Service Portal from the eCommerce tab.
- Check a product for display on the Self-Service Portal and optionally mark it as New, Featured or Special.
- Once checked the product will automatically appear on the Self-Service Portal.
- Products can also be marked for Self-Service Portal display by clicking Web Display on the Groups, Categories or Sub-Categories value lists.
- Products will be shown on the Self-Service Portal with the Product Name: “Product Code – Product Description” from Accolent ERP.
- Add an SEO Description in Accolent ERP which will be used as the “Product Description” on the Self-Service Portal.
- Use the Marketing Description in Accolent ERP to enter HTML content that will appear as “More Details” on the Self-Service Portal. Add a hyperlink to show a Product Spec Sheet if desired.
- Add Web Comments in Accolent ERP that will appear on the Self-Service Portal as Comments – this can be used for additional product information.
- This is how the product appears on the Self-Service Portal.
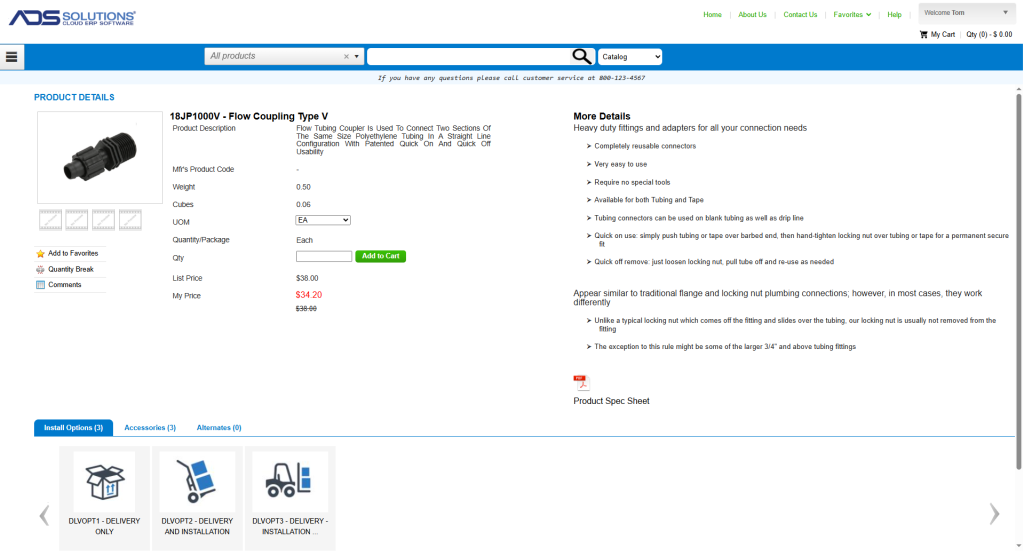
- If the Self-Service Portal is set up to show Availability, a row appears above the UOM row and indicates whether the product is in stock or not.
- If the Self-Service Portal is set up to show Stock, a pop-up button will appear on the left under the image after the Quantity Break button. The pop-up displays the quantity of the product in inventory.
Product Images
- If product images have already been set up in Accolent ERP, they will automatically be moved to the Self-Service Portal for those products marked for Self-Service Portal display.
- If product images are not in Accolent ERP, contact ADS Solutions to arrange to import them.
Order Guides
- Order Guides are a type of order template used on the Self-Service Portal.
- Order Guides can be set up in Accolent ERP > Settings > Other Value Lists (M to Z) > Order Guide then to the Customer from the customer master record.
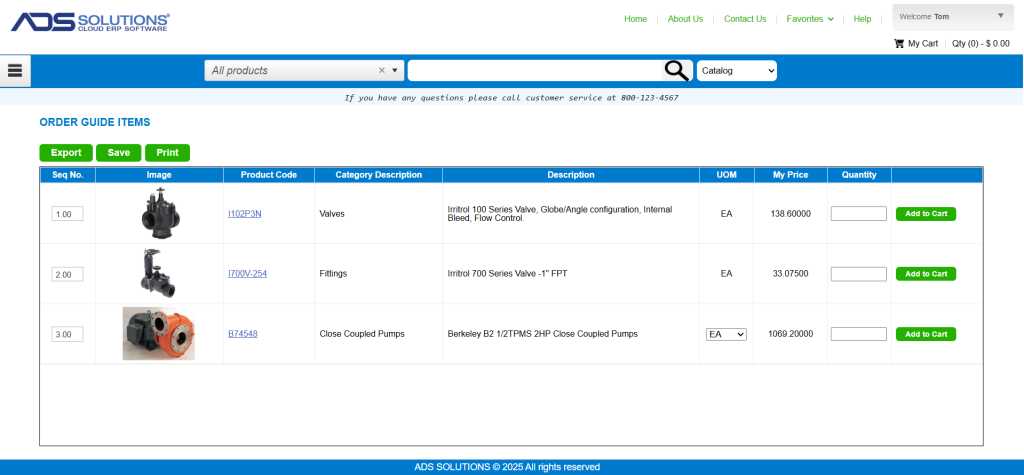
- This Order Guide is linked to Customer 011 in Accolent ERP.
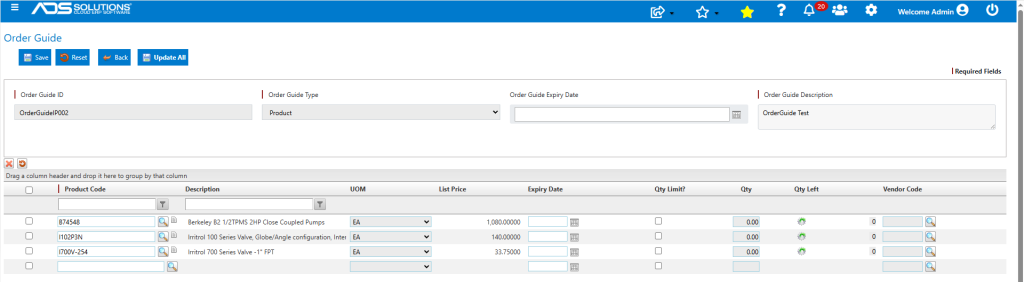
- On the Self-Service Portal, End-Users select Order Guides from the menu.
- Order Guides may be re-sequenced and printed if desired.
- End-Users can enter orders directly from the Order Guide.
Shipping Methods
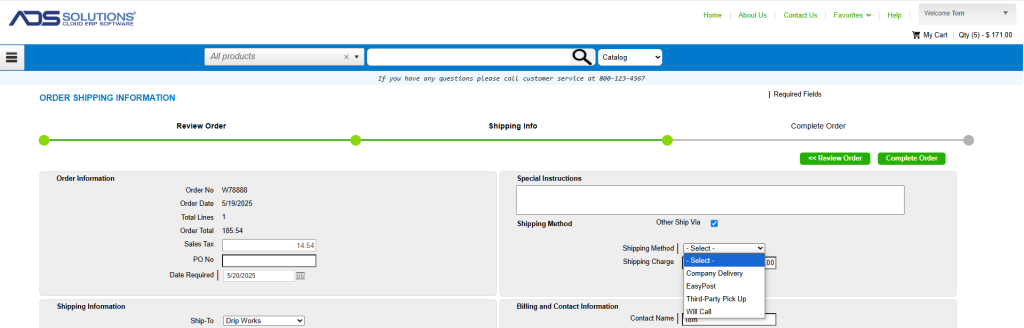
- The Self-Service Portal can use the Ship-Vias set in Accolent ERP or some pre-configured shipping method options.
Other Ship-Vias
- The Other Ship-Vias displayed on the Self-Service Portal are those set up in Accolent ERP and marked for web display.
Pre-Configured Shipping Methods
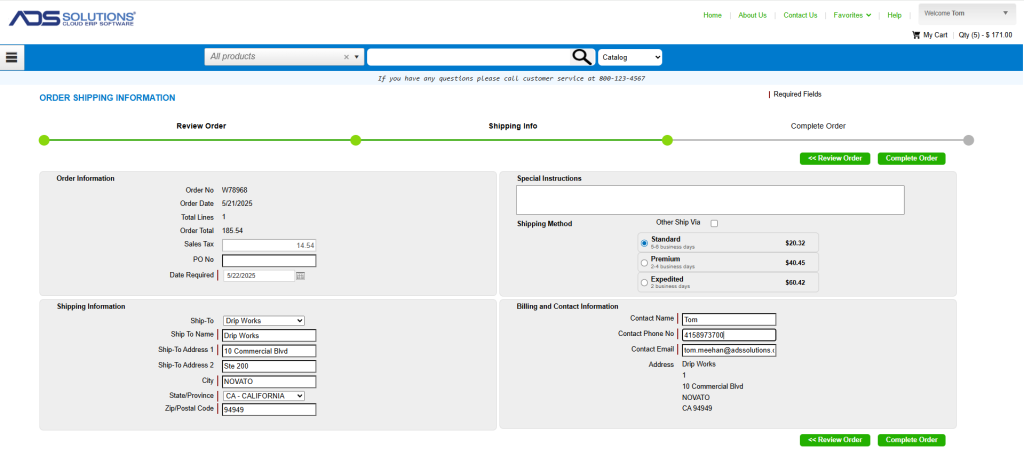
- Orders created in Accolent ERP allow the End-User to select from pre-configured shipping options.
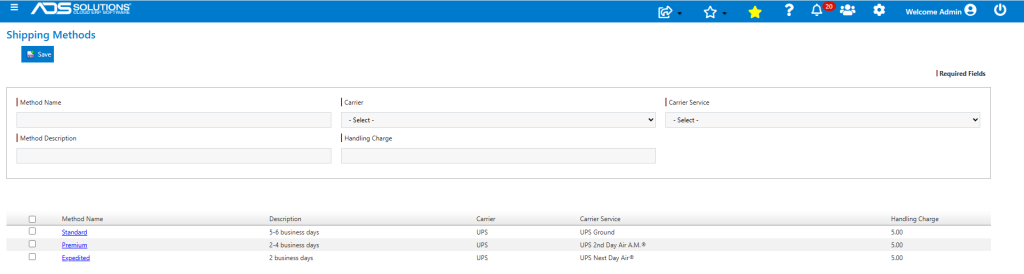
- To set up the shipping options that will appear on the Self-Service Portal, go to Accolent ERP > Settings > eCommerce Admin > Self-Service Portal > Shipping Methods.
- From this screen, several shipping methods including a handling charge can be set up to appear on the Self-Service Portal as the default options.
- Note that the pre-configured options will not display the carrier, the carrier service or the handling charge, just the dollar amount and some general delivery times.
- The Accolent ERP user will be able to rate-shop against multiple carriers to get the best available rates.
- This is how the configured shipping methods appear in the Self-Service Portal.
Set up Emails
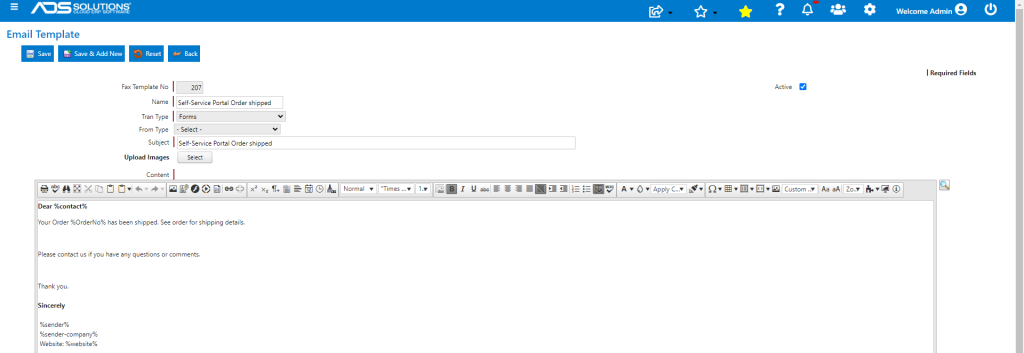
- Go to Accolent ERP > Settings > Printings & Sending > Email Templates.
- Select the Self-Service Portal email templates.

- Click on a template and use the HTML Editor and the Lookup of the variables available, to configure the emails.
Payment Settings
- The Self-Service Portal asks whether the End-User wishes to pay or not.
- If the End-User selects “Yes” this opens the Fiserv Virtual Terminal from which credit card or ACH payment details can be entered to complete the payment.
- If the End-User selects “No” on the Pay Now? screen and the Customer does not have the Credit Status of COD, then the order will be completed without payment and put on the Customer’s account.
- NOTE: Although not typical, the SSP may be set not to ask for payment – contact ADS Solutions if this is required.