
In Accolent ERP, the flow for creating computer checks is to first create vouchers for a particular vendor, then select these vouchers to pay and create checks. Various criteria are available for selecting vouchers to pay, including pay codes that may be set on the vendor.
Select Vouchers to Pay
- Go to Payables > Create Checks > Create Proposed Checks > List Proposed Checks.
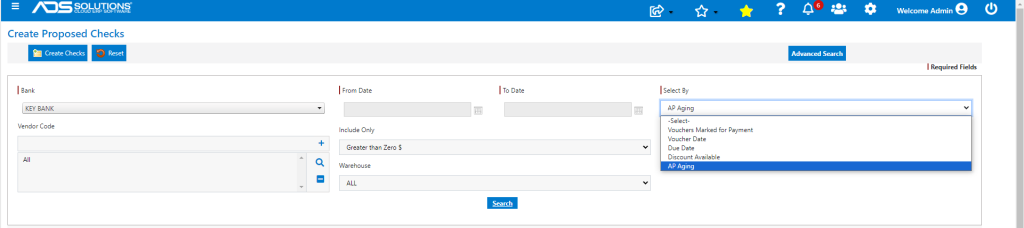
- There are several Select By options and other criteria available to search for vouchers to pay:
-
- Vouchers marked for Payment – means show all vouchers marked as Pay=Yes on the vendor master: Vendor > Actions > Vouchers,
- Voucher Date – means show all Vouchers that have a From Date < Voucher Date (also referred to as Vendor Invoice Date) ≤ To Date,
- Due Date – means show all Vouchers that have a From Date < Due Date ≤ To Date,
- Discount Available – means show all vouchers that have a discount as of Today’s Date, and
- AP Aging – means show all open vouchers in AP Aging as of Today’s Date.
- For example, select by AP Aging.
- Click Search to generate the list of vouchers to be paid.
- Click on the down arrow next to a vendor to expand the list of vouchers.
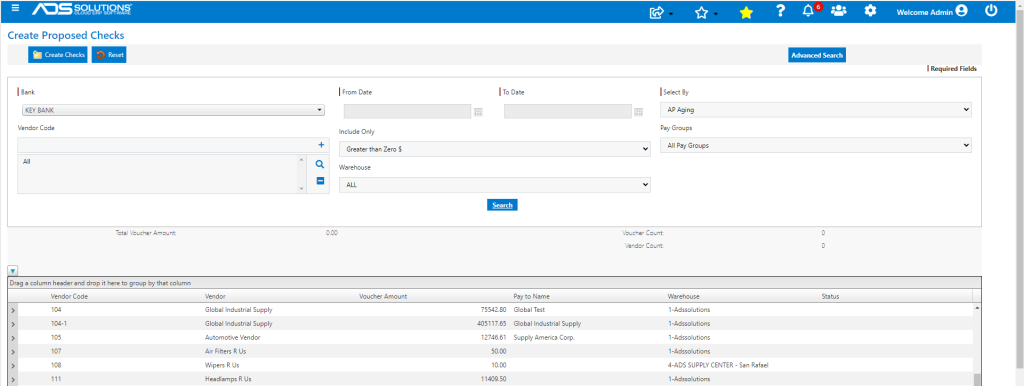
Create Computer Checks
- Select Vendor 104, for example.
- Select Vouchers for payment, and the system tracks the Total Voucher Amount, Voucher Count and Vendor Count.
- Select 10 vouchers on Warehouse 1 to pay.
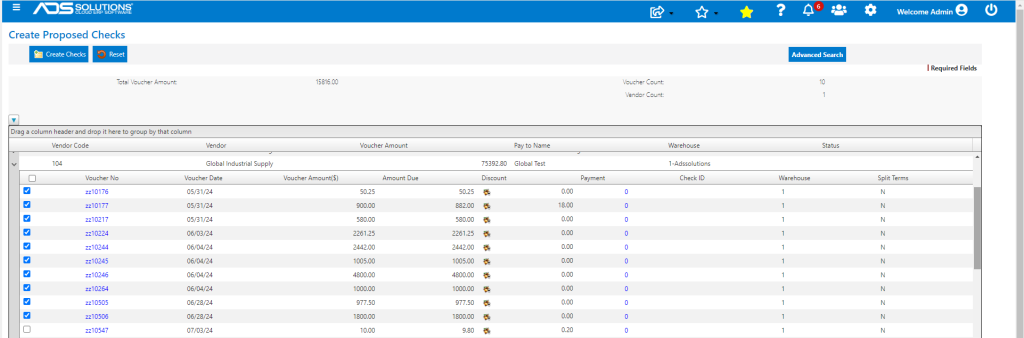
- Click on the Create Checks button.
- Shows 1 check successfully created.
- Go to Payables > Create Checks > Create Proposed Checks > Print Proposed Checks, select Bank and Search to list pending checks waiting to be printed.
- Shows one check for $15,798.00 for Vendor 104.
- Select check(s) and click Generate Checks.
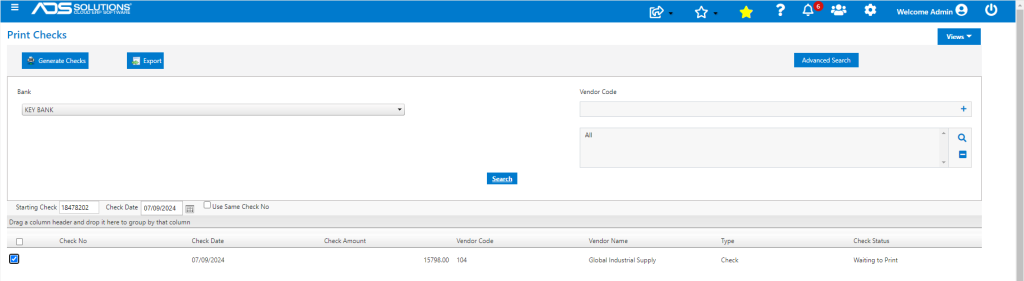
- A pop-up notifies the user that 1 check is required; select Yes to continue.
- Brings up the Printed Checks screen.
- Based on the setting on configuration ID 36, the pre-printed remittance advice form attached to the check can accept up to 11 vouchers.
- Since in this case there were 10 vouchers so the Remittance Advice will not be shown; if it were, it could be downloaded to the user’s desktop and printed separately.

- Select the checks to Print on the printer set up for this or download the PDF and print separately.
- Verify printer or change then click Print.
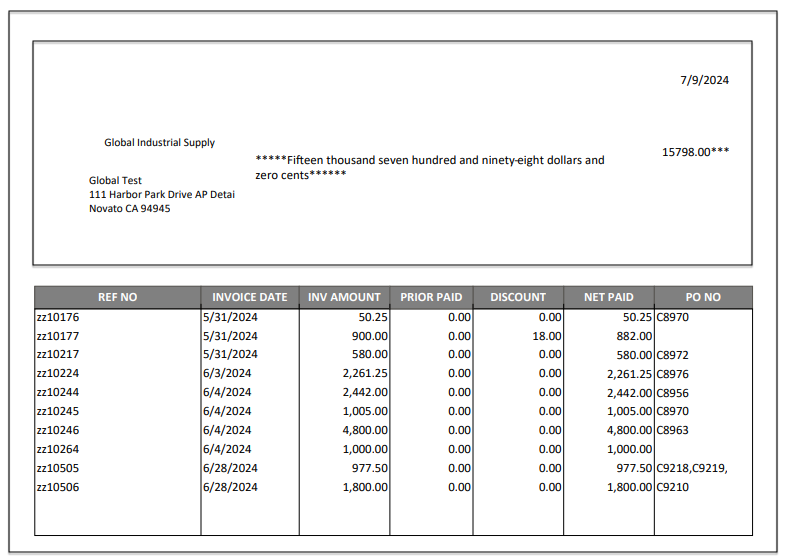
Remittance Advice (if not on Pre-Printed Form)
- If the number of Vouchers exceeds the number that can fit on the pre-printed remittance form, download the Remittance Advice.
- Open PDF of Remittance Advice and print.
Confirm Computer Checks
- Once the checks have been printed, select checks that were printed correctly and then Confirm Checks on the Printed Checks screen, to complete the process.
- If the Printed Checks screen is closed without Confirming, the Printed Checks screen will continue to list the checks with the original assigned Check Nos with Status of Waiting to Print.
- The Use Same Check No will be checked by Default which will keep the originally assigned Check Nos; unchecking will renumber the checks beginning with the Starting Check No.
- Clicking Print will again bring up the Printed Checks screen for confirmation.
Checkbook Report
- Go to Reports Center to review Check Report.
