Accolent ERP uses “Vouchers” to record vendor invoices to be paid. For a vendor’s invoice to be paid, a voucher is first created which includes information such as the vendor, the amount to be paid, description, the PO No and Receipt No being paid, the General Ledger (“GL”) account to be booked to, etc. When created the voucher is automatically booked to the GL through the AP Journal, shows up in AP Aging and is then available to be paid. Any payment discounts applicable based on the vendor’s terms or as edited by the user are applied when a check is cut to pay the voucher.
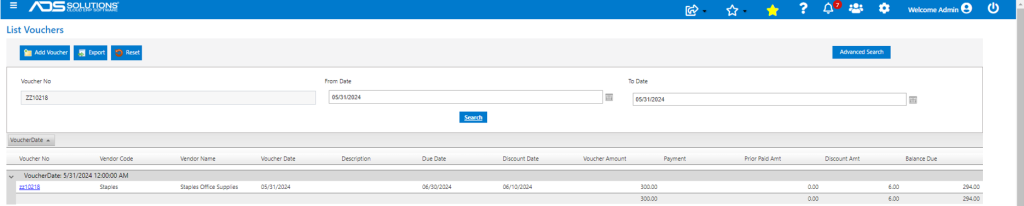
List Vouchers
- Go to Payables > Vouchers > List Vouchers to see the list of Vouchers already entered.
- The List Vouchers screen displays the entered Vouchers, together with Payment Details, Discounts based on terms and the remaining Balance Due the vendor.
- This screen can be grouped and sub-totaled by any column in the grid; for example, sub-total by voucher date.
- Click on the Voucher hyperlink to open the Voucher.
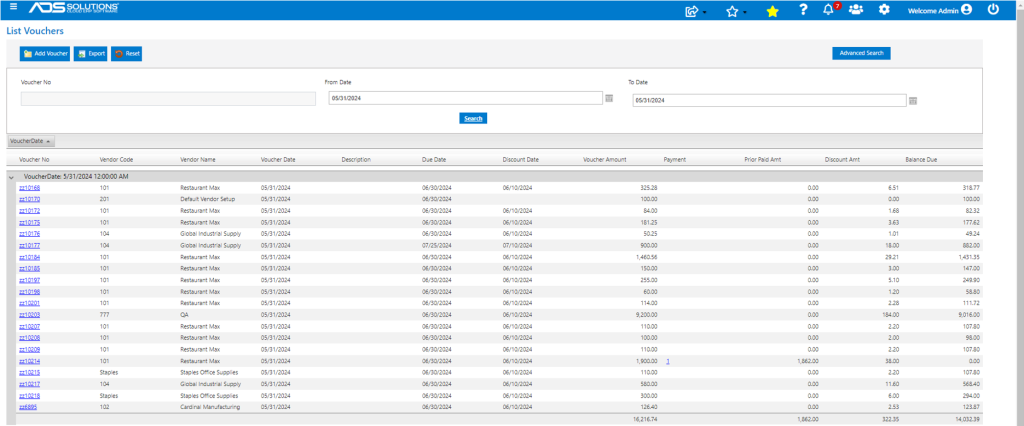
- Payment hyperlink displays the details of payments made against the Voucher

Entering a Voucher for an Inventory Vendor
- From the List Vouchers screen, click the Add Voucher button.
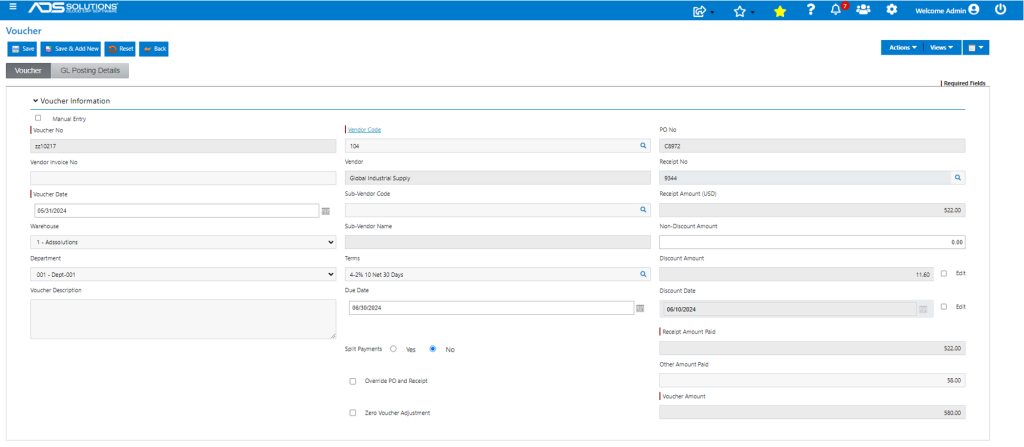
- Enter or auto-generate Voucher No and enter or lookup Vendor Code.
- Optionally enter in a Vendor Invoice No, or make this the Voucher No.
- Voucher Date will default to date of entry, Discount Amount, Discount Date and Due Date will populate based on the terms assigned to the Vendor.
- For Inventory Vendors, there is a validation of the Voucher against POs and Receipts; to override this validation, select the Override PO and Receipt checkbox.
- Use the lookup icon to see a list of PO Receipts related to this Vendor. The pop-up can be searched and/or filtered by PO if desired.
- Receipts on a single PO or on multiple POs may be selected.
- The amount of the receipts of $522.00 will default into the Receipt Amount field.
- The Non-Discount Amount field is used to enter the portion of the Invoice Amount, if any, not subject to early-payment discounts (e.g., freight charges).
- The Terms may be changed for just this Voucher without changing the Terms set on the Vendor.
- The Discount Amount and Discount Date calculate based on the Terms selected but may be changed by selecting the Edit checkbox(es).
- Note that once edited, the Discount Amount and Discount Date values will be saved with the voucher and will override any calculated early-payment discounts. The edited discount will be shown on the List Vouchers screen.
- Add a separate payment under Other Amount Paid to cover something like Vendor-paid Freight of $58.00.
- The Voucher Total is $580.00.
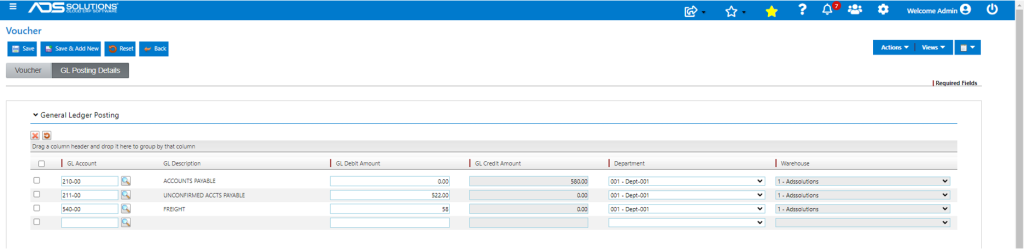
- Click on GL Posting Details tab.
- The Credit of $580.00 to Accounts Payable is automatically created as the first line of the grid.
- The Debit to Unconfirmed AP for $522.00 is also automatically created since this is set in the Vendor’s voucher allocation defaults.
- Look up GL Account 540-00 Freight Expense and manually enter a Debit of $58.00.
- Note the Warehouse default for all lines is that selected on the header, and this cannot be changed. The default Department is that selected on the header, but this may be modified line by line as desired.
- Save to Create Voucher ZZ10217.
- The voucher then shows in AP Aging and is available to be paid.
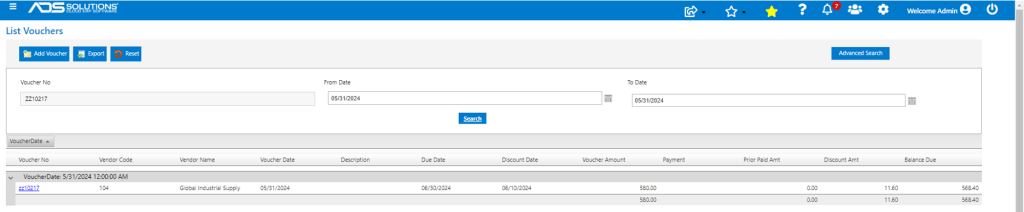
- The voucher will be automatically posted to the GL.

Entering a Voucher for Non-Inventory Vendor
- This is exactly the same as creating a voucher for an Inventory Vendor except that there may not be a PO or PO Receipt and the Voucher Allocations will be different.
- Enter Voucher No, Department and Vendor Code.
- If there is no PO and no PO Receipt, select the Override PO and Receipt checkbox.
- Enter Receipt Amount Paid of $300.00.
- If desired, enter an Other Amount Paid or leave as $0.00.
- The Voucher Total is $300.00.
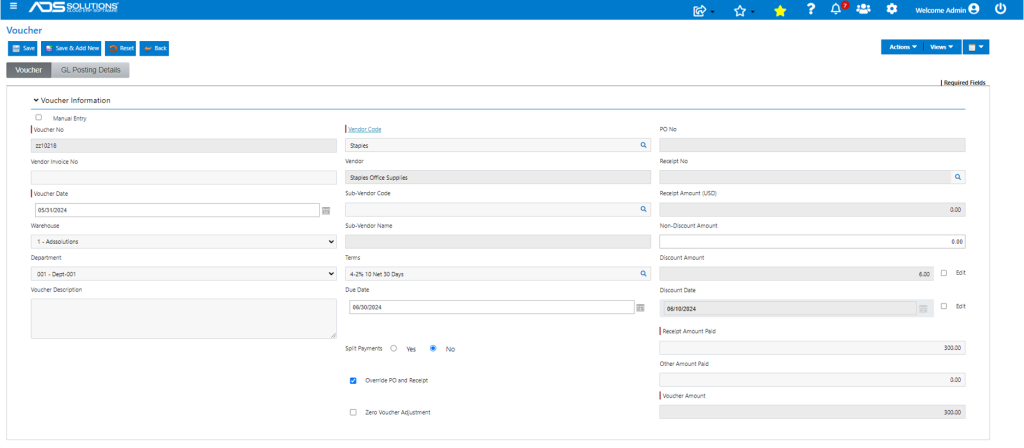
- Click on GL Posting Details tab.
- The Credit of $300.00 to Accounts Payable is automatically created as the first line of the grid.
- The Debit to Office Expense for $300.00 is also automatically created since this is set in the Vendor’s voucher allocation defaults.
- If desired another GL Account may be added as a third row and the $300.00 apportioned between Office Expense and this GL Account.
- Note the Warehouse default for all lines is that selected on the header, and this cannot be changed. The default Department is that selected on the header, but this may be modified line by line as desired.
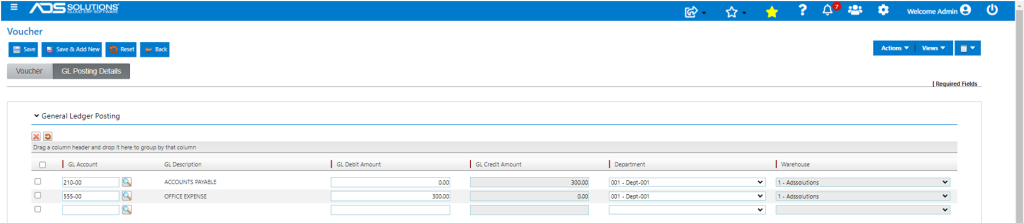
- Save to Create Voucher ZZ10218 and post to the GL.